You’ve probably seen them on TikTok, Instagram, or passed around on WhatsApp, those rich, glossy Dubai Chocolate Bars that everyone seems obsessed with lately. They’re popping up in Middle Eastern bakeries and boutique chocolate shops across the globe, but here’s the secret: you don’t need to wait in line (or overpay online) to try them. You can make the real deal right in your own kitchen.
This recipe gives you a homemade version of the viral sensation that’s taken sweet tooths by storm, no shortcuts, no cereal stand-ins, and definitely no guesswork. We’re talking crisped-up kataifi pastry (think: shredded phyllo that toasts into buttery gold), a smooth-as-silk layer of pistachio cream, and a crackling chocolate shell that snaps when you bite into it. It’s luxurious. It’s addictive. And honestly? It’s easier than it looks.
And yes, I tested this one a lot. Like… my-family-won’t-stop-eating-them level “a lot.”
If you’ve been burned by knockoff versions made with frosted cereal or gritty nut butters, this recipe’s your redemption arc. I’ll show you the exact technique to get the perfect texture, where to find ingredients (even if you don’t have a Middle Eastern grocery nearby), and how to make these bars look like you picked them up from a Dubai boutique chocolate shop.
Table of contents
- What Are Dubai Chocolate Bars?
- Ingredients You’ll Need for Dubai Chocolate Bars
- Tools and Setup: What You’ll Need to Make Dubai Chocolate Bars
- Step-by-Step Instructions: How to Make Dubai Chocolate Bars
- Tips and Troubleshooting: Get Your Bars Just Right
- Dubai Chocolate Bars Variations and Flavor Swaps
- How to Store Dubai Chocolate Bars
- FAQs
What Are Dubai Chocolate Bars?
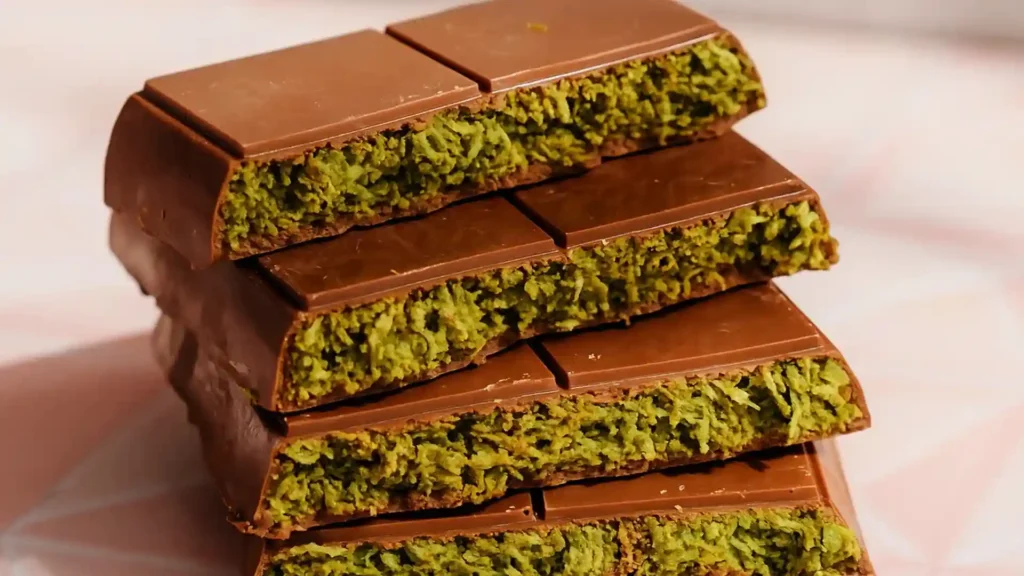
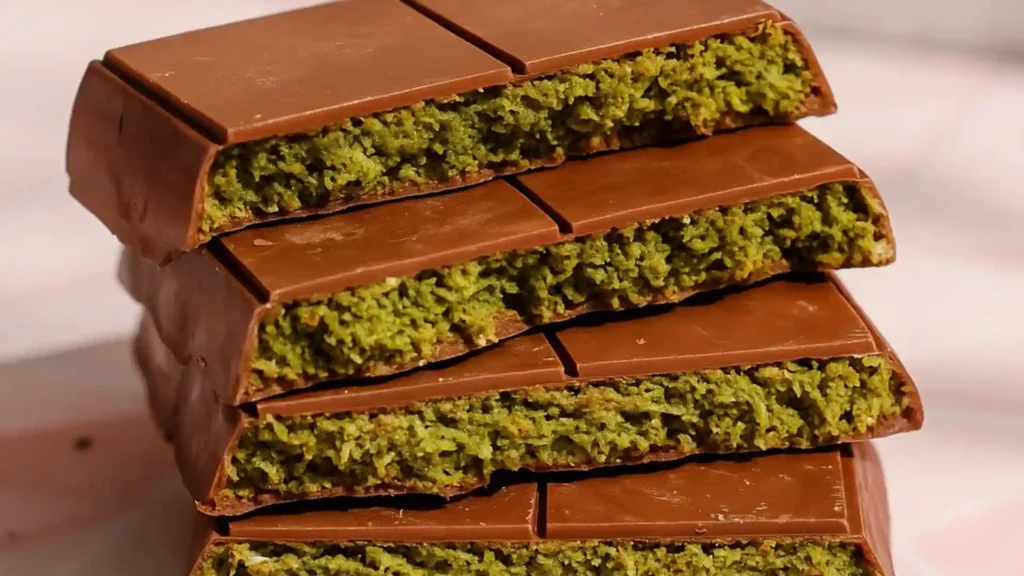
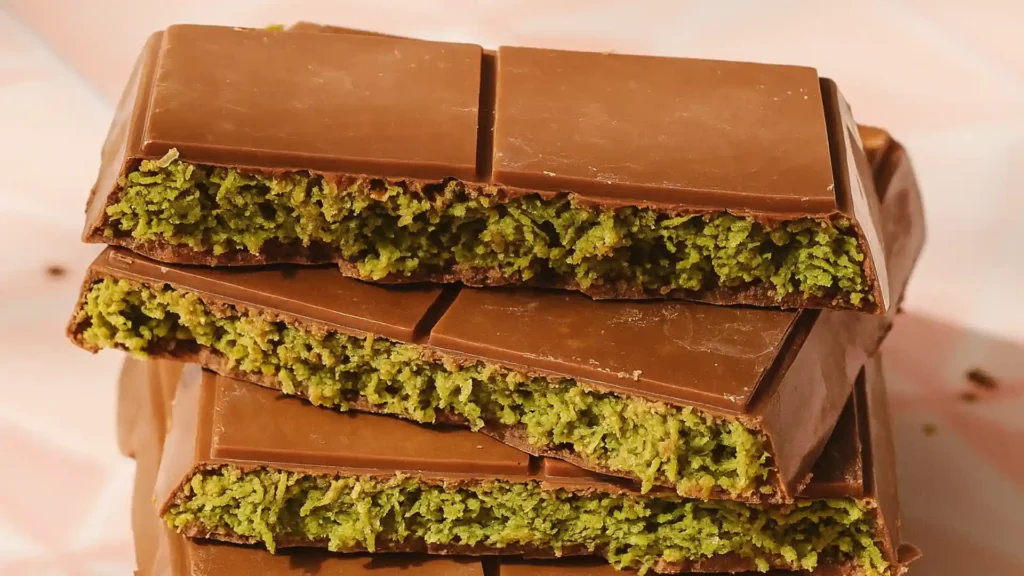
Let’s clear something up right away: Dubai Chocolate Bars aren’t just chocolate. They’re a full-on experience.
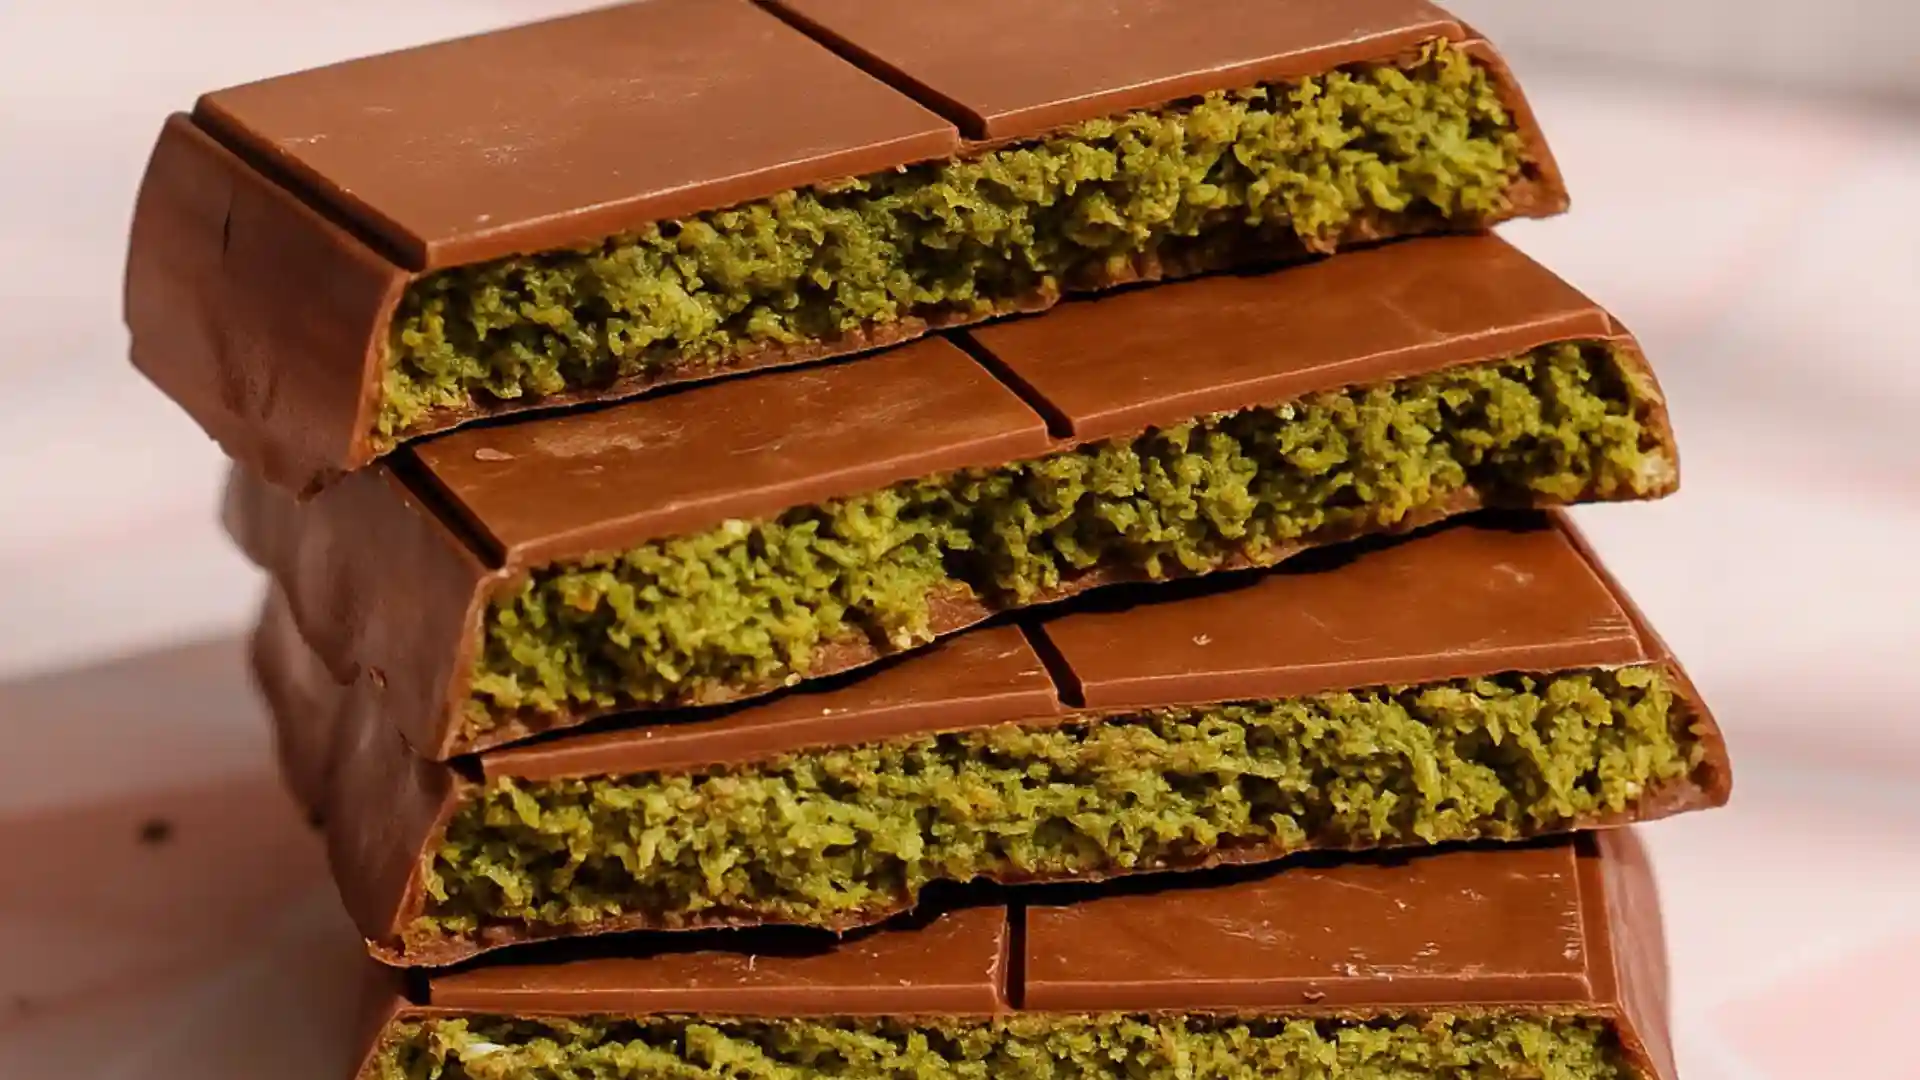
At their core, these bars are made up of three magical layers: a crispy nest of kataifi pastry, a rich pistachio filling, and a silky-smooth chocolate shell that holds everything together. The result? A bite that’s crunchy, creamy, and melt-in-your-mouth luxurious all at once.
They first gained traction in Dubai’s boutique chocolate scene, where handcrafted versions are sold like edible jewels. But once social media caught on, these bars went viral — and suddenly, everyone wanted in. That’s where the DIY versions began surfacing, with varying degrees of authenticity.
The key to the real version (and what separates it from shortcut hacks like using Frosted Mini-Wheats or granola) is the use of kataifi pastry, also called konafa dough. It’s like phyllo’s shredded cousin: thin, delicate strands of dough that toast into golden, crunchy heaven. When mixed with pistachio cream, a smooth, nutty spread somewhere between a dessert and a dream, it creates a decadent filling without being heavy.
And then, of course, the chocolate. A thin outer shell made with milk or dark chocolate gives these bars their signature “snap.” Some high-end shops drizzle extra chocolate on top, or sprinkle crushed pistachios for a little glam — feel free to do the same.
TL;DR? Dubai Chocolate Bars are what happens when texture, flavor, and pure indulgence come together — and you can totally make them yourself.
What’s the Difference Between Kataifi and Phyllo?
Kataifi is made from the same dough as phyllo but shaped into thin strands instead of sheets. When baked, it crisps up like shredded wheat meets angel hair pasta — but buttery. You’ll often find it used in Middle Eastern and Turkish desserts like kunafa or baklava rolls.
Ingredients You’ll Need for Dubai Chocolate Bars
Before we get into technique, let’s talk ingredients — because this is where the magic happens. The texture, flavor, and overall wow-factor of Dubai Chocolate Bars all hinge on using the right components (and knowing what to swap if needed).
Here’s your shopping list plus notes to help you avoid the common mistakes that make or break these bars.
| Ingredient | Amount | Notes |
|---|---|---|
| Kataifi pastry (konafah) | Use high-quality milk chocolate (e.g., Tony’s) for the best flavor | Thawed, chopped — use frozen for best results |
| Pistachio cream | 10.5 oz jar | Must be smooth cream, not pistachio butter or paste |
| Milk chocolate | 1 large bar (~6–8 oz) | Half of a 17.6 oz package |
| Butter | 2–3 tablespoons | For toasting the kataifi |
| Salt | Pinch | Optional — enhances flavor and balances sweetness |
| Chocolate bar mold | 1-inch deep | Use high-quality milk chocolate (e.g. Tony’s) for the best flavor |
Note: These ratios are flexible. Like it creamier? Add more pistachio. Want extra crunch? Boost the kataifi. There’s no “wrong” balance just your perfect version.
Tools and Setup: What You’ll Need to Make Dubai Chocolate Bars
You don’t need a fancy pastry kitchen to make these, just a few basic tools and a couple of smart substitutions if needed. This section will help you get organized so you’re not scrambling mid-recipe (we’ve all been there).
Essential Tools
- Chocolate Bar Mold (1-inch deep preferred)
This gives your bars their signature shape — sleek, polished, and just deep enough to hold that rich filling. You can find silicone chocolate molds online or at baking supply stores.
Don’t have one? No stress. Use a loaf pan lined with parchment paper and slice into bars after chilling. It won’t be as Instagram-perfect, but the flavor? Still a 10/10. - Pastry Brush or Spoon
You’ll need this to coat the mold with melted chocolate. A brush gives more control, but the back of a spoon works just fine if you don’t have one. - Double Boiler or Heatproof Bowl + Saucepan
For melting the chocolate gently — this prevents scorching and keeps it glossy. A microwave can work in a pinch, but a double boiler gives better texture control. - Skillet or Deep Pan
Used for toasting the kataifi in butter until golden and crispy. - Rubber Spatula
Makes it easier to stir in the pistachio cream and pack the filling into the mold.
Optional But Helpful
- Kitchen Scissors or Knife
To chop or break apart frozen kataifi pastry if it comes in large clumps. - Offset Spatula or Small Spreader
Handy for leveling the top chocolate layer so it seals evenly.
Step-by-Step Instructions: How to Make Dubai Chocolate Bars
Now that you’ve got your ingredients and tools prepped, it’s time to build these decadent bars layer by layer. The process is simple but impressive, like assembling a luxury item, one crunch at a time.
Step 1: Toast the Kataifi Pastry
- In a large skillet or deep pan, melt 2–3 tablespoons of butter over medium-low heat.
- Add the thawed, chopped kataifi and gently pull apart any clumps with tongs or a fork.
- Stir often until the strands turn golden brown and smell toasty. This should take about 5–7 minutes.
- Once crisp, remove from heat and sprinkle with a pinch of salt. Set aside to cool slightly.
Step 2: Mix in the Pistachio Cream
- Warm the pistachio cream in the microwave for 20–30 seconds just enough to loosen it up.
- Pour it over the toasted kataifi and stir until everything is evenly coated. The mixture should be sticky, nutty, and ready to spoon into your molds.
Step 3: Melt the Chocolate
- In a double boiler (or heatproof bowl over simmering water), melt your milk chocolate until smooth and glossy.
- Stir gently, avoiding overheating, which can cause the chocolate to seize or thicken.
Step 4: Coat the Chocolate Mold
- Using a pastry brush or spoon, spread a thin layer of melted chocolate inside your chocolate bar mold bottom and sides.
- Place the mold in the freezer for about 5–10 minutes to harden.
Step 5: Add the Filling
- Once the chocolate shell is set, spoon in the kataifi-pistachio mixture, pressing it down gently to ensure it fills every corner.
- Don’t overpack; just a firm, even layer.
Step 6: Seal with More Chocolate
- Spread another thin layer of melted chocolate on top to seal the bar.
- Use a spatula or the back of a spoon to smooth it out.
Step 7: Chill and Set
- Place the mold in the fridge or freezer until the top layer is fully set (about 15–20 minutes).
- Once firm, gently pop the bars out of the mold.
Step 8: Serve at Room Temperature
- Let the bars sit at room temperature for 5–10 minutes before eating.
- This brings out the flavors and softens the texture just enough for the perfect bite.
Tips and Troubleshooting: Get Your Bars Just Right
Dubai Chocolate Bars look impressive, but they’re surprisingly forgiving. That said, a few smart tweaks can mean the difference between “pretty good” and “absolutely addictive.” Here’s how to make sure yours come out perfectly and what to do if they don’t.
Don’t Overcook the Kataifi
- Too dark = bitter.
Kataifi toasts quickly once it starts browning. Keep the heat at medium-low and stir constantly. - Pro tip: Remove from heat just before it looks “done.” It continues to toast slightly from residual heat.
Pistachio Cream Too Thick?
- If your cream is stiff or gritty, microwave it for 20–30 seconds and stir. It should pour like honey or Nutella. If it still feels pasty, try mixing in a teaspoon of neutral oil (like sunflower or mild olive oil) to loosen it.
Chocolate Shell Cracking?
- This happens if the chocolate layer is too thick or uneven.
- Apply a very thin coating first, freeze it, then add a second light coat if needed.
- Make sure the mold is cold but not icy when sealing sudden temp shifts cause cracks.
No Chocolate Mold? No Problem
- Use:
- A loaf pan lined with parchment
- Silicone muffin molds
- Ice cube trays (for mini bites!)
- Even cupcake liners, just don’t forget to brush the sides with chocolate
Bars Not Setting?
- If your room is warm, the chocolate may stay soft.
- Chill longer in the fridge or pop them into the freezer for 10–15 minutes.
- Avoid placing hot filling into freshly coated molds; let the kataifi-pistachio mix cool first.
Dubai Chocolate Bars Variations and Flavor Swaps
Once you’ve nailed the classic version, don’t stop there. One of the best things about Dubai Chocolate Bars is their ability to cater to diverse tastes. Whether you’re going for nut-free, extra indulgent, or totally unexpected, here are a few fun ways to remix your bars.
Switch Up the Chocolate
- Dark chocolate: Adds richness and balances the sweetness of the pistachio cream.
- White chocolate: Pairs beautifully with pistachio, creating a softer, sweeter profile.
- Layered chocolate: Try swirling milk and dark for a marble effect.
Flavor Boosts
- Add a dash of cardamom or cinnamon to the kataifi mixture for a warm, Middle Eastern twist.
- Splash of orange blossom or rose water (just a few drops) adds a floral note — subtle and elegant.
Nut Butter Variants
- Not a pistachio fan? Swap in:
- Hazelnut cream (hello, Ferrero vibes)
- Almond butter mixed with a bit of honey
- Cashew cream with vanilla for a buttery flavor
Tip: Stick to smooth, sweetened spreads, gritty or oily butters won’t hold the texture well.
Add Crunch or Contrast
- Sprinkle crushed roasted nuts over the filling before sealing
- Add a layer of crushed wafer or biscuit crumbs between the filling and chocolate for extra crunch
- Top with flaky sea salt or edible gold dust for a luxe look
Make It Vegan or Dairy-Free
- Use dairy-free chocolate and vegan butter (or coconut oil) for the kataifi
- Choose a plant-based nut spread without added dairy
Mini Version? Yes, Please
- Use silicone muffin molds or ice cube trays to make mini versions, perfect for gifting or enjoying bite-sized indulgences.
How to Store Dubai Chocolate Bars
Once you’ve gone through the effort of making these luscious bars, the last thing you want is for them to go soggy, stale, or worse, melt into a puddle on the counter. Here’s how to store Dubai Chocolate Bars so they stay crisp, creamy, and crave-worthy for days.
Room Temperature (Best for Short-Term Enjoyment)
- Ideal storage: Airtight container, in a cool, dry spot.
- Shelf life: Up to 4–5 days without losing crunch or flavor.
- Pro tip: Line the container with parchment paper to prevent sticking or condensation buildup.
Refrigerator (If Your Kitchen Runs Warm)
- If your home is consistently over 75°F (24°C), store the bars in the fridge to prevent the chocolate from softening.
- Let them sit at room temperature for 10–15 minutes before serving; This brings back the ideal bite and flavor balance.
Freezer (For Long-Term Storage)
- Wrap each bar in parchment or wax paper, then place in a sealed container or zip-top freezer bag.
- Shelf life: Up to 2 months.
- To serve: Thaw in the fridge overnight or let sit on the counter for 30–40 minutes. Avoid microwaving; it ruins the texture.
Storage Don’ts
- ❌ Don’t store in direct sunlight or near heat sources, as chocolate melts, and the kataifi loses its crunch.
- ❌ Avoid storing with strong-smelling foods (onions, garlic), as chocolate absorbs odors easily.
FAQs
What’s the Difference Between Kataifi and Phyllo Dough?
Both are made from the same dough, but phyllo is rolled into thin sheets while kataifi is shredded into fine strands. When baked, kataifi crisps into a delicate, crunchy texture that’s impossible to replicate with sheets of phyllo.
Can I Make These Without a Chocolate Mold?
Yes! A loaf pan lined with parchment paper works well. Simply pour the chocolate, add the filling, seal with more chocolate, and cut into bars once set. You can also use silicone muffin cups or even ice cube trays for mini versions.
Are Dubai Chocolate Bars Actually From Dubai?
They became famous in Dubai thanks to boutique chocolatiers, but the flavors and techniques draw from broader Middle Eastern traditions — kataifi and pistachio are staples across Turkish, Lebanese, and Arabic desserts. The “Dubai” name is more about branding and where the trend went viral.
Can I Use Dark Chocolate Instead of Milk?
Absolutely. Dark chocolate adds a richer, slightly bitter contrast to the sweet pistachio cream. It won’t be the classic “Dubai bar” flavor, but it’s delicious if you prefer less sweetness.
How Long Do These Last?
At room temperature, about 4–5 days. In the fridge, up to a week. In the freezer, around 2 months — just make sure they’re wrapped well so the chocolate doesn’t pick up freezer odors.
Can I Make Them Nut-Free?
You won’t get the authentic pistachio flavor, but you can swap in sunflower seed butter or a smooth cookie butter spread. The texture works; the taste will just be a different (but still tasty) treat.
Dubai Chocolate Bars
Ingredients
Equipment
Method
- Step 1: Melt butter in a skillet over medium-low heat. Add the chopped kataifi and toast, stirring often, until golden brown and crispy (5–7 minutes). Sprinkle with salt and set aside.
- Step 2: Warm the pistachio cream in the microwave for 20–30 seconds. Pour over the toasted kataifi and mix until fully coated.
- Step 3: Melt the milk chocolate in a double boiler until smooth and glossy, stirring occasionally.
- Step 4: Brush a thin layer of melted chocolate inside a chocolate bar mold (or loaf pan lined with parchment). Freeze for 5–10 minutes until hardened.
- Step 5: Spoon the kataifi-pistachio mixture into the mold, pressing gently to fill evenly.
- Step 6: Spread a thin final layer of melted chocolate over the top to seal. Smooth with a spatula.
- Step 7: Chill in the fridge (15–20 minutes) or freezer (10 minutes) until fully set. Pop out of the mold and enjoy at room temperature.
Notes
Looking for more cooking and baking inspiration? Browse our Pinterest boards or join the conversation with us on Facebook.