I still remember the first time I tried making cottage cheese pancakes. They looked so good in the photos online, golden, fluffy, “packed with protein,” you know the type. But mine? A hot, rubbery mess. Dense in the middle, weirdly salty on the edges, and somehow both soggy and burnt. Not exactly the breakfast-of-champions moment I had in mind.

Actually, scratch that, it wasn’t just a failure. It was the kind of failure that makes you wonder if people who post recipes online have magic ingredients the rest of us don’t.
But three years and more than twenty trial runs later, I’ve figured out why so many cottage cheese pancakes go sideways… and more importantly, how to make them actually work.
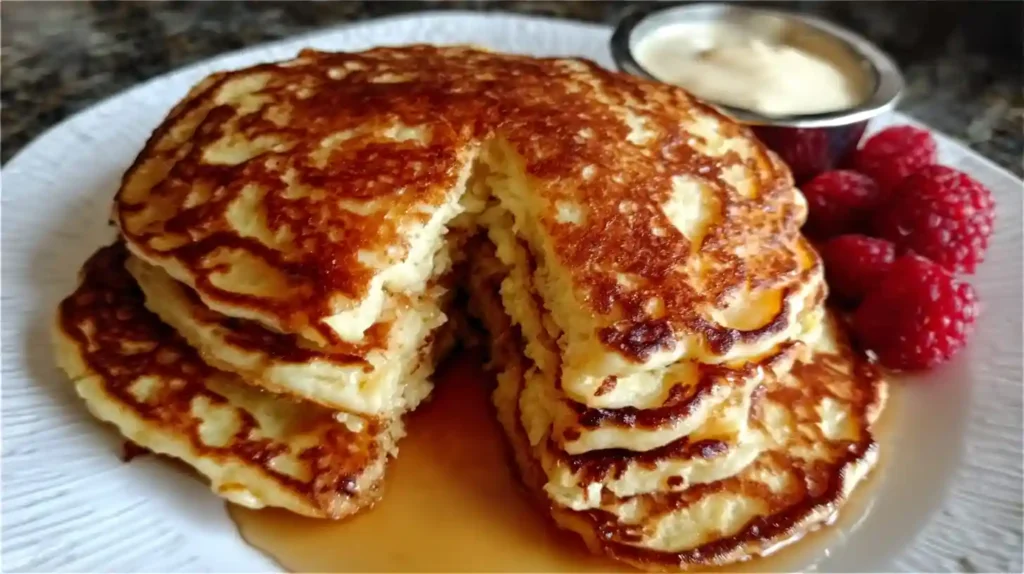
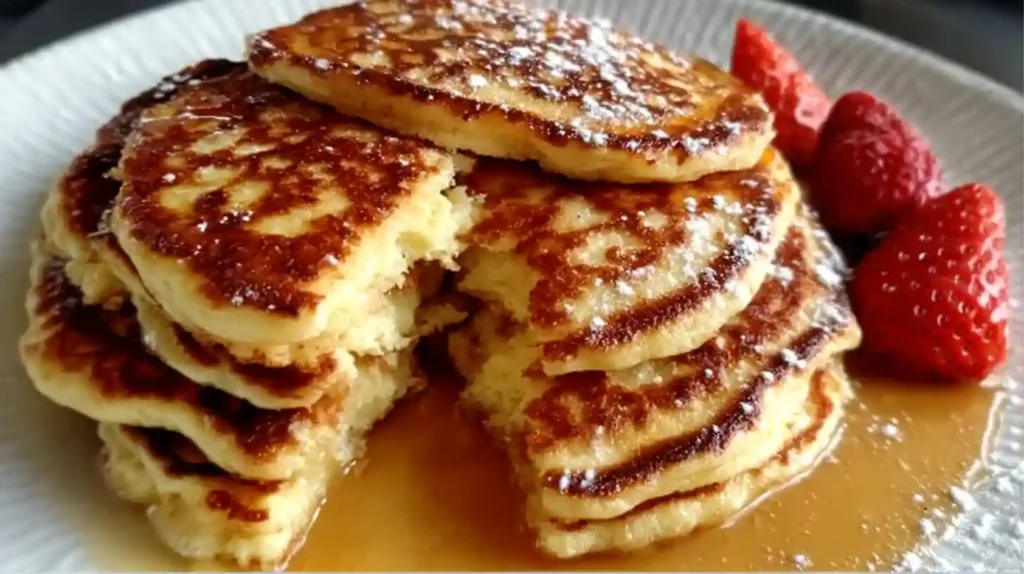
This isn’t your typical fluffy diner stack. These are something else entirely, more like a custard-meets-crepe hybrid, with creamy centers, crisp edges, and just the right balance of sweet and tangy. They’re rich in protein, gluten-free, low in carbs, and surprisingly filling. Oh, and the recipe? Six ingredients. One bowl. Under 15 minutes.
If you’ve ever tried (and failed) to make a flourless pancake that doesn’t fall apart, taste bland, or stick to the pan like glue, you’re in the right place. Because once you get these right, they’re the kind of breakfast that quietly becomes a ritual.
Table of contents
- Why You’ll Love These Pancakes
- Ingredient List and Smart Substitutions
- Tools You Actually Need (Minimalist Kitchen Gear)
- Step-by-Step Instructions (With Real Tips You’ll Use)
- Texture, Taste & Tang: What to Expect
- Dietary Notes And Macros
- Serving Ideas to Elevate the Plate
- Pro Tips From the Trenches (Mistakes I Made So You Don’t Have To)
- FAQs
- Other Simple Pancake Recipes:
Why You’ll Love These Pancakes
Let’s be honest: “healthy pancakes” often means one of two things: dry and disappointing, or loaded with 12 different ingredients you have to Google. These? They’re the outlier. The kind you look forward to making again, not just tolerate because “they’re good for you.”
Here’s why they’ve earned a permanent spot in our breakfast rotation and why they might become your go-to, too.
High-Protein Energy That Actually Satisfies
Each serving of these flourless cottage cheese pancakes packs over 20 grams of complete protein. That’s not just a number; it’s the difference between being full until lunch versus scavenging for snacks by 10 AM. Unlike traditional pancakes that spike your blood sugar and vanish from your system in an hour, these hold their own.
And yes, I’ve tested this with a continuous glucose monitor. The difference? Noticeable. You feel steady, not sluggish.
Kid-Approved Without the Sugar Crash
One of my biggest wins? My eight-year-old, known maple syrup addict, asked for these “cheese pancakes” on her birthday morning. If that doesn’t say something, I don’t know what does.
They’ve got that subtly sweet, rich flavor that feels indulgent, but they’re secretly loaded with protein, calcium, and no refined sugar. You can dial the sweetness up or down depending on your kiddo’s taste (or yours).
Fast, Fail-Resistant, and Zero Morning Drama
You don’t need a degree in culinary arts to make these. Just five basic ingredients, one bowl, and a hot pan. No flour. No baking powder. No “let it rest for 20 minutes” nonsense.
From fridge to plate in under 12 minutes, even with a coffee in one hand and a toddler asking 47 questions.
Budget Friendly and Grocery Store Friendly
A tub of cottage cheese costs less than a cafe latte. Eggs? You already have them. Maple syrup? One bottle lasts forever. This breakfast clocks in around $1.20 per serving and outperforms any $4 protein bar or drive-thru option I’ve tried.
Plus, no weird specialty flours or protein powders (unless you want to add them later, I’ve got options coming up).
Ingredient List and Smart Substitutions
There’s something strangely comforting about a recipe you can memorize after making it once and this is one of them. Just five base ingredients, all familiar, all flexible (within reason). No obscure flours, no binding agents, no bananas pretending to be something they’re not.
Let’s walk through what you need and how to tweak it if necessary.
| Ingredient | Amount | Notes |
|---|---|---|
| Cottage cheese | 1 cup | Full-fat, small curd preferred (e.g., Good Culture, Daisy) |
| Eggs | 3 large | Room temperature if possible, but cold is fine |
| Maple syrup | 1 tablespoon | Or honey; avoid artificial pancake syrups |
| Vanilla extract | 1/4 teaspoon | Optional; skip for savory variations |
| Fine sea salt | A pinch | Enhances flavor |
| Butter or coconut oil | As needed for cooking | Use to grease the pan; avoid non-stick sprays |
Pro Shopping Tip
Look for cottage cheese with:
- Just 3–5 ingredients (milk, cream, salt, cultures)
- Live cultures if possible they help flavor and digestion
- No added gums, starches, or stabilizers
I use a large tub and repurpose it for snacks, scrambled eggs, and savory toast it won’t go to waste.
Can I Use…?
- Ricotta? Tempting, but no. Too soft, not enough structure.
- Greek yogurt? It works in baking, not here. Not enough curd structure.
- Liquid sweeteners like stevia? Yes especially if going low-carb. Just go slow (¼ tsp to start).
- Flavored cottage cheese? Only if you like gambling with texture and salt levels. I don’t recommend it.
Tools You Actually Need (Minimalist Kitchen Gear)
The beauty of this recipe? You don’t need a blender, food processor, or anything fancy. Just a few honest kitchen basics, the kind you probably already have.
This isn’t about the latest gadget. It’s about the right tools that make the process smoother and your pancakes better.
Must-Have Tools
| Tool | Why You Need It |
|---|---|
| Non-stick or cast iron pan (10-inch) | The single most important tool. Non-stick makes flipping easier; cast iron gives better browning. |
| Wide, thin spatula | These pancakes are delicate a wide spatula makes flipping cleaner and less stressful. |
| Medium mixing bowl | Big enough to whisk without splashing batter all over your counter. |
| Whisk or fork | Non-stick or cast-iron pan (10-inch) |
Optional, But Helpful
- 1/4 cup measuring cup – For scooping consistent pancake sizes
- Kitchen scale – If you’re a precision person. (1/2 cup cottage cheese ≈ 4 oz)
- Fine mesh strainer – If your cottage cheese is extra watery, a quick drain helps the texture
- Warming rack or oven – To keep pancakes warm while finishing the batch
Real Talk from the Trenches
- If your pan is scratched or cheap, these will stick. I learned the hard way. It’s worth investing in one good non-stick or a properly seasoned cast iron.
- A silicone spatula is not your friend here. Go with metal or sturdy plastic; you need lift and control.
- Don’t overthink the bowl or whisk. This isn’t meringue, just mix well and move on.
Step-by-Step Instructions (With Real Tips You’ll Use)
This isn’t a just-dump-and-stir situation, but it’s close. What really matters is how you mix, heat, and flip. Each step has a few small moments that can make or break the final texture.
Here’s how to get it right from the start without frustration, sticky pans, or floppy disasters.
Step 1: Whisk the Wet Stuff
Start by cracking your eggs into a medium bowl and giving them a solid whisk for about 20 seconds, until fully mixed.
Then add:
- 1 cup cottage cheese
- 1 tablespoon maple syrup
- 1/4 teaspoon vanilla (if using)
- Pinch of sea salt
Don’t overmix. This is one of the biggest mistakes. You don’t want a totally smooth batter. A few small curds = creamy pockets of gold in your final pancake. Just mix until it’s combined for about 30 seconds.
Step 2: Heat Your Pan (Low and Slow Wins)
Set your non-stick or cast-iron pan over medium-low heat. Wait until it’s hot but not aggressively hot.
Test it: Flick a drop of water in. It should sizzle gently, not pop or evaporate instantly.
Add a little butter or coconut oil. Swirl it around to coat the whole surface.
Skip this and you’re guaranteed to stick even in a non-stick pan.
Step 3: Pour and… Wait
Use a 1/4 cup scoop or just eyeball it. Pour gently this batter is looser than traditional pancake mix, so it’ll spread on its own.
Now, and this is key, do not flip early.
You won’t see bubbles like you do with flour-based pancakes. Instead, wait for:
- The edges to set and look slightly dry
- The surface to turn matte instead of shiny
This takes about 3–4 minutes.
You’ll feel the right moment after your first few tries promise.
Step 4: Flip and Finish
Slide your spatula under one edge, then in one confident motion: flip.
It’s okay to mess up the first one. That’s your test pancake. Use it to adjust heat, timing, and pan greasing.
Let the second side cook for 2–3 minutes, until golden brown and lightly springy when pressed.
Repeat with the rest of the batter. Re-grease the pan as needed every 2–3 pancakes is a good rule.
Common Trip-Ups (and How to Dodge Them)
- Rubbery pancakes? → The heat was too high. Lower it and cook more slowly.
- Falling apart? → Didn’t wait long enough to flip.
- Too tangy? → Use milder cottage cheese or add a touch more sweetener.
- Sticking? → Not enough butter, or the pan wasn’t hot enough.
Texture, Taste & Tang: What to Expect
This isn’t your classic diner pancake experience, and that’s the point. If you walk into this recipe expecting fluff, you’ll be confused. But if you’re open to something richer, creamier, and slightly unexpected? You’ll get it.
Let’s break it down bite by bite.
The First Bite Surprise
The first thing you notice isn’t the sweetness, it’s the texture. Soft, almost custard-like in the center. Crisp, golden edges that chew just a little. Then comes the subtle tang from the cottage cheese, followed by a mellow sweetness from the maple.
You don’t even taste “cheese” in the sharp cheddar way. It’s more like a creamy backdrop, almost like a ricotta crepe, but better structured.
Why It Tastes So Good
Cottage cheese isn’t just filler, here, it’s the secret. When heated with eggs, the curds melt slightly, creating tiny pockets of richness. The whey adds moisture but doesn’t water things down. It’s a natural emulsifier, giving these pancakes that smooth bite without flour or gums.
The maple syrup? It’s doing double duty: flavor and function. It caramelizes slightly on the edges, adds depth, and balances the tang. Add a splash of vanilla, and you’ve got a quietly complex flavor without being fussy.
Balancing Flavor Like a Pro
- Want more sweetness? Add an extra teaspoon of maple syrup to the batter.
- Too tangy for your taste? Choose a smoother cottage cheese, small curd, full-fat is usually less sharp.
- Craving more tang? Go big curd or try cultured cottage cheese.
- Going savory? Skip the sweeteners entirely and toss in some herbs (see variations next).
These aren’t pancakes that hide behind toppings; they hold their own. But if you like layering flavors, you’ve got a strong canvas to build on.
Dietary Notes And Macros
Whether you’re counting carbs, chasing protein, or just trying to avoid gluten without going full rabbit food — this recipe pulls its weight. And then some.
These pancakes aren’t trying to be “healthy” in a trendy, joyless way. They just happen to be naturally aligned with what a lot of people are looking for.
What They Do Contain
- Dairy Cottage cheese is the base. If you’re dairy-free, this probably isn’t your pancake (and that’s okay).
- Eggs are Essential for structure and protein. No plant-based substitute has worked in testing.
- Natural sugars from maple syrup or honey. You can reduce or replace if needed.
What They’re Free From
- Flour
- Gluten
- Refined sugar (when using pure maple or honey)
- Weird gums or binders
No xanthan gum, no arrowroot, no mystery powders. Just real food doing what it does best.
Nutrition Per Serving (2 Pancakes)
| Macro | Amount |
|---|---|
| Calories | ~245 kcal |
| Protein | ~22g |
| Net Carbs | ~8g |
| Fat | ~14g |
| Sugar (natural) | ~7g |
| Calcium | ~15% DV |
Why This Protein Hits Different
Not all protein is created equal. These pancakes contain complete protein, meaning all nine essential amino acids are present in the right ratios. That’s something even some protein bars can’t brag about.
Combined with healthy fats, this keeps blood sugar stable and energy consistent. I’ve tracked this on a CGM; the difference compared to flour-based pancakes is real.
Dietary Tweaks You Can Try
- Low-Carb / Keto:
Replace maple syrup with stevia or monk fruit (start with 1/4 tsp liquid). Net carbs drop to ~4g per serving. - High-Protein Upgrade:
Stir in 1 tablespoon of unflavored or vanilla protein powder. If using flavored, reduce vanilla extract in the batter. - More Fat, Less Sugar:
Add a teaspoon of nut butter or some chia seeds to the mix, rich, satiating, and blood sugar-friendly.
Are these pancakes keto-friendly?
Yes, with a simple tweak. Swap the maple syrup for a keto-approved sweetener, and you’re golden. These are naturally low in carbs and high in fat and protein, making them a solid fit for keto or low-glycemic diets.
Serving Ideas to Elevate the Plate
You made the pancakes. Now let’s make them feel special, whether you’re feeding kids in five minutes or plating something Instagram-worthy for yourself.
Good pancakes become great when paired with the right sides, textures, and toppings. It’s not about piling on sugar, it’s about balance.
Sweet Pairings That Make Sense
- Fresh berries + drizzle of honey — adds brightness and a juicy contrast
- Sliced banana + cinnamon — comforting and nostalgic
- Nut butter + crushed nuts — creamy + crunchy = perfect bite
- Greek yogurt + sugar-free syrup — cool, tangy, and low-glycemic
- Apple slices sautéed in butter + cinnamon — fall in pancake form
Pro tip: Avoid drowning them in syrup a little goes further here than with fluffy pancakes, since the texture is already rich.
Savory Sides That Just Work
- Avocado slices + flaky salt — creamy meets tangy
- Fried or poached egg — protein on protein, and the yolk is magic
- Crispy turkey bacon or smoked salmon — salty contrast
- Sautéed spinach + garlic — especially good for savory versions
- Everything bagel seasoning — oddly perfect on these, especially with cream cheese
Beverage Pairings (Because Why Not?)
- Strong coffee (obviously)
- Green tea — balances the richness
- Protein smoothie — great if you’re doubling down on recovery or meal prep
- Chai or turmeric latte — cozy pairing for the lemon or cinnamon versions
Make It Pretty Without Stress
- Stack confidently — these hold shape well
- Layer fruit between pancakes — visual contrast + flavor layering
- Warm your plates — 3 minutes in a 200°F oven keeps everything hotter, longer
- Color contrast is king — golden pancakes + dark berries = visual win
Pro Tips From the Trenches (Mistakes I Made So You Don’t Have To)
Some recipes feel forgiving, this one is… selectively forgiving. It rewards attention to detail and punishes impatience. But once you get the hang of it, it becomes second nature.
Here’s what I wish someone had told me before my first five batches flopped.
Start With the Right Mindset
- These are not fluffy pancakes. Stop expecting that and you’ll love them for what they are: rich, custardy, satisfying.
- The first one is always a test pancake. Accept it. Don’t panic. Use it to adjust your pan heat and timing.
- Lower heat = better texture. Every time someone tells me their pancakes came out rubbery. They cooked it too hot, too fast.
Technique That Actually Matters
- Don’t overmix. Visible cottage cheese curds = creamy pockets in the final texture. Smooth batter = dense mess.
- Grease your pan generously. This isn’t the time to skimp. A dry pan equals sticking sadness.
- Wait before flipping. If the edges aren’t set and dry-looking, you’re flipping too soon. Patience pays off.
Equipment Truths
- Cheap pans betray you. If your non-stick is scratched or warped, these will stick. Cast iron or quality non-stick is worth the investment.
- Use a wide spatula. The bigger the flipping surface, the less chance you’ll shred your pancake mid-air.
Ingredient Wisdom
- Fresh cottage cheese matters. Old or watery cottage cheese = weird flavor and runny batter.
- Sweetness can be adjusted. Too tangy? Add ½ teaspoon more syrup. Too sweet? Dial it back next time.
- Protein powder changes texture. Add no more than 1 tablespoon or it gets dry fast.
Why are mine falling apart every time?
Likely culprits:
- Batter too thin (watery cottage cheese?)
- Pan too cool (edges never set)
- Flipped too early (surface still shiny)
- Not enough fat in the pan (pancakes grip the surface)
Start small, test one pancake, and adjust from there. These reward learning over time.
FAQs
Can I make the batter ahead of time?
Not ideal. The batter separates quickly and loses structure. But you can cook the pancakes ahead — they reheat beautifully (especially in the toaster).
Why aren’t mine fluffy?
Because they’re not supposed to be. These are custard-like, think pancake-meets-crepe, not diner-stack. If you’re craving fluff, try adding a spoonful of almond flour… but it changes the texture.
Can I double the recipe?
Yes, but cook it in two batches, not all at once. The batter doesn’t sit well for long, and crowding the pan leads to uneven cooking.
Are they really filling?
Surprisingly so. Two pancakes usually keep me satisfied for 3–4 hours, thanks to the 20+ grams of protein and high-fat content. If you’re used to carb-heavy breakfasts, the difference is noticeable.
What if I don’t have maple syrup?
You’ve got options. Honey works great. A teaspoon of plain sugar is fine, liquid stevia or monk fruit for low-carb versions. Just skip pancake syrup; it’s too artificial and doesn’t brown the same.
Can kids eat these?
Absolutely. My 8-year-old asked for them on her birthday. Start with a touch more sweetener if your kids are used to sugary breakfasts, and keep portions small; they’re denser than regular pancakes.
Other Simple Pancake Recipes:

Flourless Cottage Cheese Pancakes
Ingredients
Equipment
Method
- Whisk the Batter: In a medium bowl, whisk eggs until fully combined. Add cottage cheese, maple syrup, vanilla, and sea salt. Stir gently until just mixed — do not overmix.
- Heat the Pan: Warm a non-stick skillet over medium-low heat. Add a small amount of butter or oil and let it melt fully.
- Cook the Pancakes: Scoop 1/4 cup of batter per pancake into the pan. Let cook 3–4 minutes or until edges are set and the surface looks matte.
- Flip Carefully: Flip using a wide spatula. Cook 2–3 more minutes until golden and springy to touch.
- Repeat and Serve: Re-grease pan as needed and repeat with remaining batter. Serve warm with your favorite toppings.
Notes
Looking for more cooking and baking inspiration? Browse our Pinterest boards or join the conversation with us on Facebook.