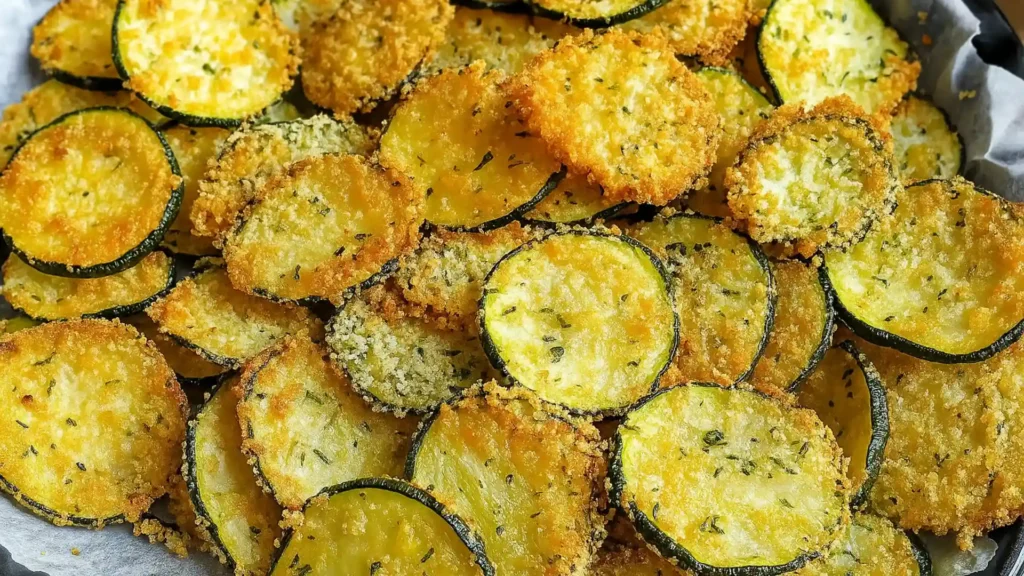
Let’s talk about the unicorn of healthy snacks, the kind your whole family wants to eat. For us, that magical discovery came in the form of Garlic Parmesan Zucchini Chips. Before these, it was a parade of half-eaten apple slices, reluctantly dipped carrots, and those seaweed snacks that never quite lived up to the hype.
Love zucchini recipes? Don’t miss this reader-favorite:
👉 Grandma’s Zucchini Relish – A Sweet and Tangy Summer Classic
It’s the perfect way to use up extra garden zucchini and add bold flavor to sandwiches, burgers, and more.
But these? They changed the game.
I threw them together on a whim: zucchini rounds, garlic powder, Parmesan, a bit of olive oil. I wasn’t chasing perfection, just trying to avoid another snack-time sigh. But what came out of the oven was snack gold: crisp, golden bites that smelled like an Italian bistro and vanished faster than any chip bag ever did.
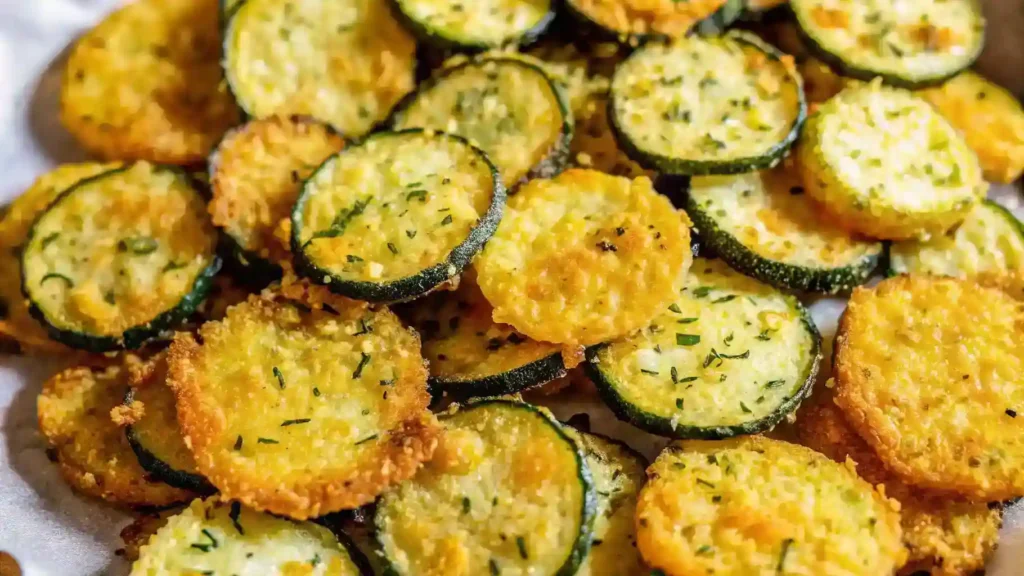
My chip-loving husband called them “dangerously addictive.” My veggie-dodging kids fought over the last piece. And me? I’ve been making them weekly ever since.
Table of contents
- Why Garlic Parmesan Zucchini Chips Turn Out Crispy Every Time
- Garlic Parmesan Zucchini Chips Ingredients (And Smart Swaps That Work)
- How to Make Garlic Parmesan Zucchini Chips (Step-by-Step)
- Crispiness Tips and Troubleshooting (Because Nobody Wants a Limp Chip)
- What to Serve with Garlic Parmesan Zucchini Chips
- How to Store and Reheat Garlic Parmesan Zucchini Chips Without Losing the Crunch
- FAQs
Why Garlic Parmesan Zucchini Chips Turn Out Crispy Every Time
You’ve probably seen recipes like this floating around the internet: “Crispy Zucchini Chips in 20 Minutes!” But here’s the thing: most of them gloss over what matters.
So let’s break it down.
1. The Moisture Trick No One Talks About
Zucchini is over 90% water. If you skip the salting-and-draining step? You’ll end up with a sense of deep sadness. This recipe leans heavily into the drying phase: salt, pat dry, repeat so the chips crisp, not steam.
2. Garlic + Parmesan = Instant Umami
It’s not just about flavor. The garlic powder (not fresh — on purpose) gives concentrated depth without burning, and the Parmesan acts like a natural breadcrumb; it crisps up while locking in flavor.
3. Oven Temp Sweet Spot
At 400 °F, you hit that zone where the chips dry and crisp without scorching. And if you’re the proud owner of an air fryer? You’ve got options, too.
4. Kid-Approved, Adult-Addictive
This isn’t a “sneaky veggie” situation. It’s just genuinely tasty. Adults reach for these with wine; kids grab them before homework. It’s that rare crossover hit.
What Makes These Different from the Usual Zucchini Chips?
- No breadcrumbs or deep frying
- Uses simple pantry ingredients
- Oven-baked with real crisp, not rubbery rounds
- Perfect as a side, snack, or even party appetizer
Why are my zucchini chips soggy?
Most likely? You didn’t draw out enough water. Always salt the slices and let them sit for at least 15 minutes before blotting. Also, slice uniformly thin (a mandoline helps), and don’t overcrowd the pan.
Garlic Parmesan Zucchini Chips Ingredients (And Smart Swaps That Work)
Before you preheat that oven, let’s get your lineup right. The beauty of this recipe? It leans minimal — but each ingredient earns its spot.
Core Ingredients
- 2 medium zucchinis – sliced thin (¼ inch or less)
- ½ teaspoon salt – for drawing out moisture
- 1 tablespoon olive oil – helps crisp and adds richness
- ¼ cup grated Parmesan cheese – the real kind, not the powdery shaker stuff
- ½ teaspoon garlic powder – gives that deep, roasted flavor
- Optional: freshly cracked black pepper or red pepper flakes – for a little kick
Ingredient Swaps and Variations
- Vegan? Swap Parmesan for nutritional yeast + a pinch of salt.
- Gluten-Free? Already is!
- No olive oil? Avocado oil works just as well.
- Want bold flavor? Add a pinch of smoked paprika or Italian seasoning to the cheese mix.
- Trying it in an air fryer? Go lighter on the oil, these crisp faster.
Can I use yellow squash instead of zucchini?
Yep, yellow squash has a similar water content and texture. Just slice the same thickness and prep the same way. The only difference is color and a slightly sweeter flavor.
How to Make Garlic Parmesan Zucchini Chips (Step-by-Step)
These aren’t one of those “toss it all in and hope” recipes. There’s a method here, and it makes all the difference.
1. Slice the Zucchini Evenly
- Aim for slices ⅛ to ¼ inch thick; thinner means crisper.
- A mandoline slicer makes this way easier (and safer if you’re doing batches).
- Too thick = soggy middles. Too thin = burnt edges.
2. Salt + Sweat the Moisture
- Lay slices flat on a paper towel-lined surface.
- Sprinkle salt on both sides and let them sit 15–20 minutes.
- This step is non-negotiable. It draws out water so you get crunch, not mush.
- After sweating, blot them well with more paper towels.
3. Toss in Oil and Seasoning
- In a large bowl, combine:
- Olive oil
- Garlic powder
- Parmesan cheese
- Optional: pepper or spice add-ins
- Toss zucchini slices gently to coat. You want each slice lightly covered but not drenched.
4. Bake to Perfection
- Preheat oven to 400°F (200°C).
- Arrange slices on a parchment-lined baking sheet in a single layer.
- Bake for 15–20 minutes, flipping halfway if you want even browning.
- Watch the last 5 minutes closely, chips can turn from golden to too dark quickly.
5. Cool + Serve
- Remove chips when edges are golden brown and cheese starts to crisp.
- Let them rest for 5 minutes on the pan; they crisp more as they cool.
- Serve immediately or store for a few hours (they don’t stay crisp overnight).
Air Fryer Option
- Set the air fryer to 375°F.
- Arrange slices in a single layer (don’t stack).
- Cook for 8–10 minutes, checking after 6. Air fryer results vary.
Can I prep these ahead of time?
Sort of. You can slice and salt the zucchini in advance (store in the fridge overnight), but bake right before serving; that’s when they’re at their best.
Crispiness Tips and Troubleshooting (Because Nobody Wants a Limp Chip)
Here’s where things get real. You followed the recipe, did the slicing, even watched the timer… and still ended up with zucchini flops instead of chips. Been there.
Let’s fix that.
Why Aren’t They Crispy?
- Too much moisture: Zucchini holds more water than you think. If you didn’t salt and blot thoroughly, you’re baking steamed veggies.
- Slices too thick: Thicker slices take longer to dry — and by the time they do, they’re overcooked on the outside.
- Crowded pan: Chips need space. If they’re overlapping or piled up, they steam instead of roasting.
- Wrong cheese: Shaker-style Parmesan (the shelf-stable kind) doesn’t melt or crisp well. Use freshly grated if possible.
How to Rescue a Soft Batch
- Pop them back in the oven at 425°F for 5 minutes, spaced out on a fresh parchment sheet.
- For air fryer users: reheat at 375°F for 2–3 minutes, but watch like a hawk.
Bonus Tips for Ultra-Crisp Results
- Add a teaspoon of cornstarch or almond flour to the cheese mix — it absorbs extra moisture.
- Use a wire rack on the baking sheet to allow airflow underneath.
- After baking, crack the oven door and let chips sit for 10 minutes — it helps evaporate remaining steam.
Why do my chips stick to the pan?
Either your parchment paper isn’t good quality (some cheaper brands stick), or you used too much cheese, which melts and hardens like glue. Try lightly oiling the parchment, or use a silicone baking mat for stick-free results.
What to Serve with Garlic Parmesan Zucchini Chips
Sure, you could scarf these straight off the tray — no shame. But if you want to make them feel like more than just a baked veggie chip? Here’s how to serve them like a pro (or a parent who tricks their kids into eating vegetables without a fight).
Dipping Ideas
- Marinara sauce – classic pizza vibes dip.
- Garlic aioli – for when you’re feeling fancy.
- Ranch or Greek yogurt dip – great for kids and veggie skeptics.
- Spicy sriracha mayo – brings a little grown-up heat.
Pair With…
- Grilled chicken or steak – a crunchy, low-carb side that works year-round.
- Turkey burgers or veggie wraps – skip the fries.
- Soup night – yes. These chips make a crunchy topper or spoonable snack.
Entertaining Tip
Hosting a game night or casual get-together? Make a double batch and serve these warm on a platter with a trio of dips. People will assume you’ve got it together. You don’t need to correct them.
Can I serve these cold?
You can, but they’re best within the first hour out of the oven. Cold, they lose some of that addictive crunch. If you must prep ahead, reheat in a 375°F oven for 5 minutes before serving.
How to Store and Reheat Garlic Parmesan Zucchini Chips Without Losing the Crunch
These rarely make it past the cooling rack. But on the off chance you’ve got a few left (or you wisely made a second tray), here’s how to keep them crisp-ish and snackable.
Storage Basics
- Let the chips cool completely before storing any trapped steam = sogginess.
- Place them in an airtight container, lined with a paper towel to absorb moisture.
- Store at room temperature for up to 1 day; any longer and the texture starts to fade.
Do not refrigerate. Zucchini chips + fridge = sad, chewy discs.
Reheating Tips
- Preheat oven to 375°F.
- Spread chips on a fresh sheet of parchment or a wire rack.
- Bake for 5–6 minutes, until crisp again.
- For an air fryer: 2–3 minutes at 370°F works wonders.
Can I freeze zucchini chips?
Technically? Yes. But realistically? No. They don’t re-crisp well from frozen — the texture turns mealy. Better to make a fresh batch (they only take 30 minutes start to finish).
FAQs
Why are my zucchini chips soggy?
Usually, it’s excess moisture. Be sure to salt and sweat the slices, then blot them well before baking. Also, don’t overcrowd the pan.
Can I use yellow squash instead of zucchini?
Yes! Yellow squash has similar moisture content and texture. It’s a great substitute, just slice and bake the same way.
What’s the best way to slice zucchini for chips?
Use a mandoline for even slices, about ⅛ to ¼ inch thick. Consistency helps with even baking and crispness.
Are these zucchini chips keto-friendly?
Definitely. With low carbs, moderate fat, and a touch of protein, they fit well into most keto or low-carb plans.
Can I freeze zucchini chips?
Technically, yes, but it’s not ideal. Freezing affects the texture and ruins the crispness. Fresh-baked is always best.
Garlic Parmesan Zucchini Chips
Ingredients
Equipment
Method
- Slice zucchini into thin, even rounds about 1/8–1/4 inch thick using a mandoline or sharp knife.
- Lay slices on paper towels and sprinkle both sides with salt. Let sit for 15–20 minutes to draw out moisture, then blot dry.
- Preheat oven to 400°F (200°C). Line a baking sheet with parchment paper.
- In a bowl, toss zucchini slices with olive oil, Parmesan cheese, garlic powder, and optional pepper or spices until evenly coated.
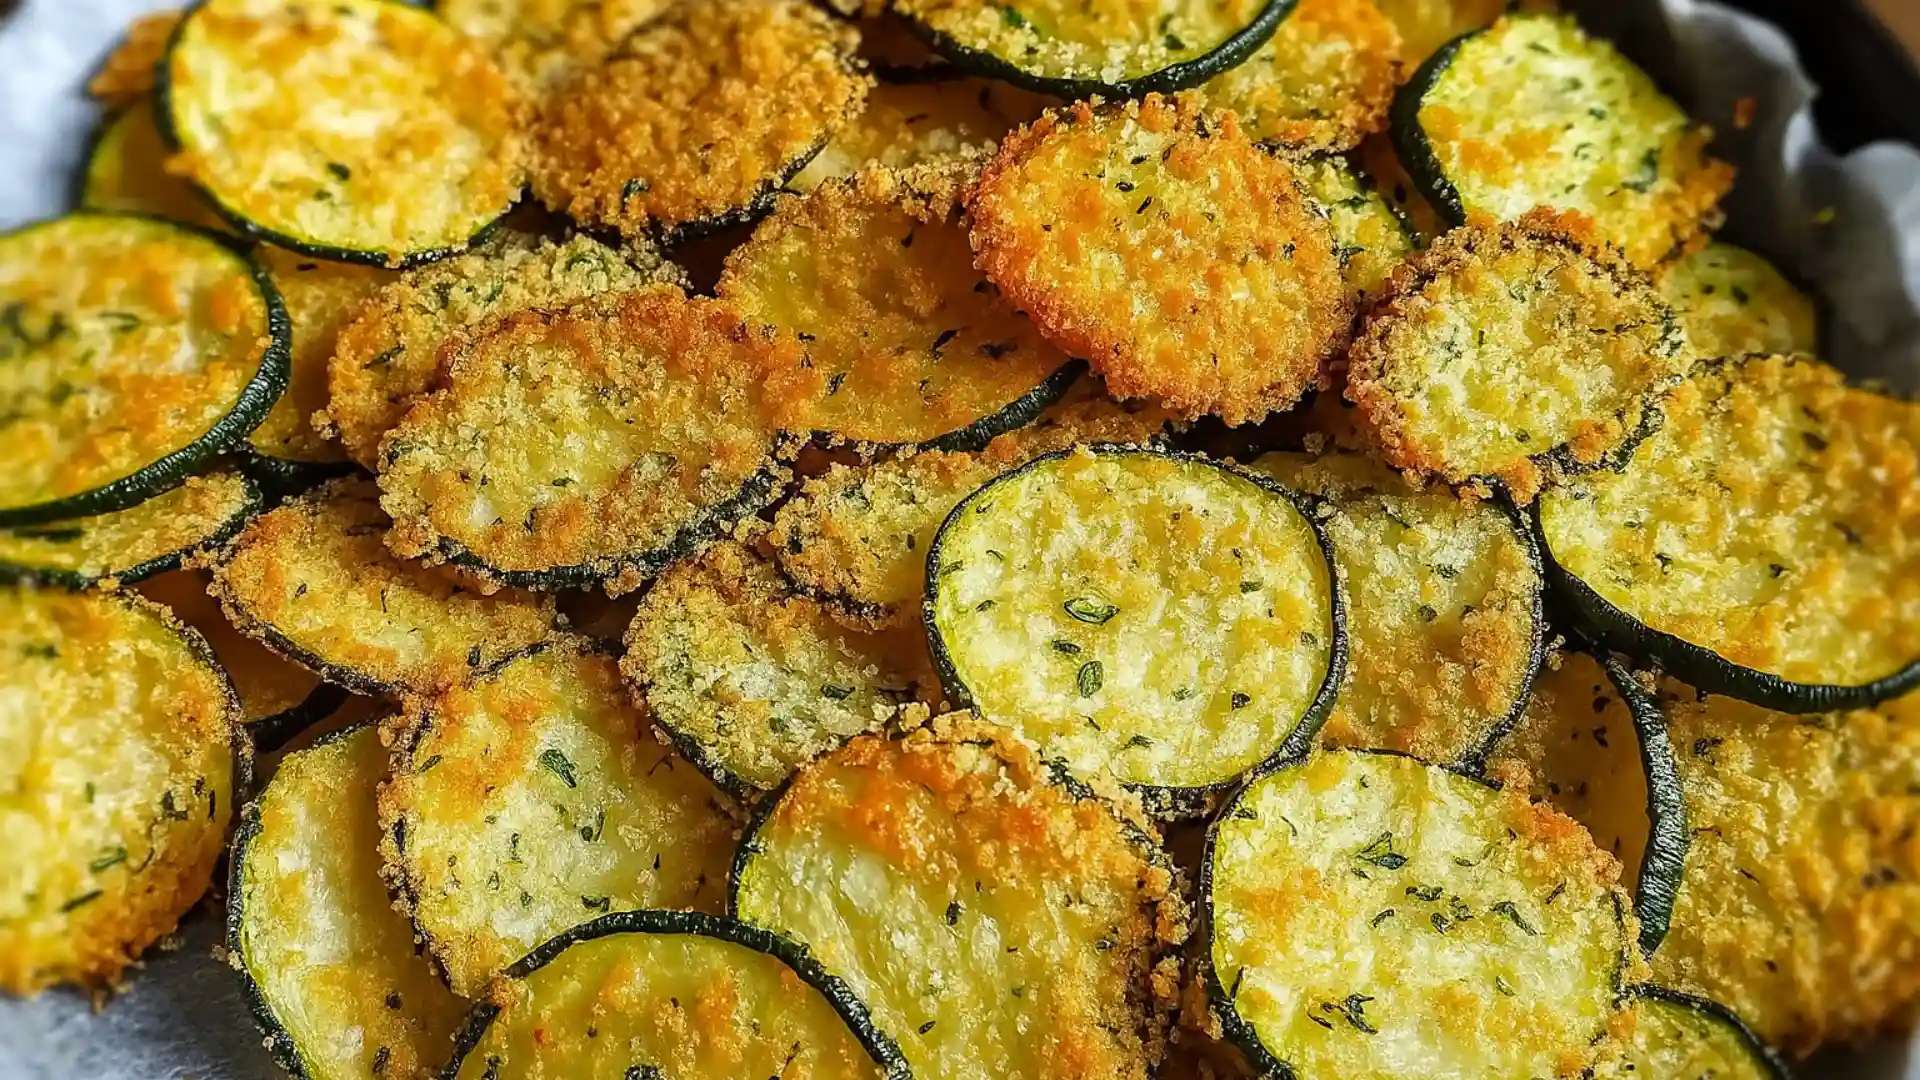
- Arrange slices in a single layer on the baking sheet. Bake for 15–20 minutes until golden and crisp around the edges.
- Remove from oven and let cool for 5 minutes. Chips will continue to crisp as they cool. Serve warm.
Notes
Follow me on Pinterest for more delicious recipes and culinary inspiration – your best source for tasty, shareable food ideas!