A nostalgic, no-fuss dessert that makes everyone smile
There’s something weirdly magical about dirt pudding. Maybe it’s the crushed Oreos masquerading as soil, or the gummy worms wiggling their way into your heart, but one spoonful and suddenly, you’re eight years old again. No oven, no drama, no fancy techniques. Just chocolatey layers, whipped fluff, and unapologetic childhood joy.
This Oreo Dirt Cup pudding isn’t just a dessert, it’s a mood. It’s what you bring to a backyard party when you don’t have time to bake. It’s what you make when your kid says, “I need a snack,” and you’re secretly in the mood for something fun too. And yes, it’s 100% acceptable to make a batch just for yourself. No judgment here.
In this recipe, I’ll show you how to layer it like a pro, make it pop for parties, and even tweak it if you want a minty or peanut buttery twist. Sound good? Let’s get into the dirt.
Table of contents
Why Oreo Dirt Cup Pudding Is Still Everyone’s Favorite
There’s a reason this dessert has stuck around for decades. It’s not just nostalgia, though; yes, it absolutely tastes like Saturday afternoon cartoons and backyard birthday parties. It’s also that rare mix of effortless prep, guaranteed smiles, and just the right amount of silliness.
Let’s be honest, we all need desserts that don’t take themselves too seriously. And this one shows up with crushed cookies and gummy worms, like, “Hey, let’s have some fun.” It’s a crowd-pleaser whether you’re hosting a kids’ party, planning a holiday buffet, or want something low-effort but high-impact.
Here’s what makes it unbeatable:
- No oven. No stress. You can make this half-asleep, and it’ll still turn out great.
- Kid magnet. The colors, layers, and worms? It’s basically a guaranteed hit at any age.
- Customizable to the max. Fancy mint? Peanut butter? Want to add fruit? Go for it.
- Make-ahead friendly. Whip it up hours early and let the fridge do the rest.
- Portable & presentable. Whether you go big bowl or single-serve jars, it always looks cute.
It’s sweet, messy in the best way, and just irreverent enough to be memorable. No wonder it keeps making a comeback; it never really left.
Ingredients You’ll Need (and Smart Substitutes)
You won’t need a long shopping list or fancy baking aisle detours. Most of these are pantry regulars — and if they’re not, they should be. Here’s what goes into the classic Oreo Dirt Cup pudding, plus a few clever swaps if you’re feeling experimental.
| Ingredient | Quantity | Notes |
|---|---|---|
| Instant chocolate pudding mix | 1 package (3.9 oz / 110 g) | Use instant, not cook-and-serve |
| Cold milk | 2 cups (480 ml) | Whole or 2% preferred; cold is key |
| Oreo cookies | 15 cookies | Crushed — mix fine and chunky crumbs |
| Whipped topping | 1 cup (240 ml) | Like Cool Whip or homemade whipped cream |
| Gummy worms (optional) | As desired | Adds fun and visual appeal |
How to Make Oreo Dirt Cups (Step-by-Step)
You don’t need to be a pastry chef to pull this off. In fact, the charm of this recipe lies in its beautiful simplicity. Here’s how to layer your way to dessert greatness in under 15 minutes.
Step 1: Make the pudding
In a medium bowl, whisk the instant chocolate pudding mix with cold milk. It should thicken up in about 2 minutes. Don’t over-whisk you want it smooth, not frothy. Let it sit while you prep everything else.
Step 2: Crush the Oreos
Toss the cookies into a zip-top bag and give them a good smash with a rolling pin (or your hands — no judgment). You’re aiming for a mix of crumb sizes, some fine like soil, some chunky for crunch.
Step 3: Start layering
Choose your container: clear cups, jars, or a big bowl all work. Start with a base of crushed Oreos, then add a layer of pudding, followed by a spoonful of whipped topping. Repeat the layers until you’re out of ingredients or your cup is full.
Step 4: Top with gummy worms
Gently press a few gummy worms into the top layer. Let them peek out like they’re crawling through the “dirt,” trust me, it’s part of the fun.
Step 5: Chill (if you can wait)
Cover and refrigerate for at least 30 minutes if you want it cold and set. But if you’re like me and can’t resist, eating it right away is still totally delicious.
Can I make this in advance?
Absolutely. Just hold off on adding the gummy worms until just before serving; they can get soggy if they sit in the pudding too long.
Serving Ideas to Make Them Pop
One of the best things about Oreo Dirt Cups? They look as fun as they taste. Whether you’re going for charmingly casual or a little Pinterest-level flair, here are some presentation ideas that give this dessert that extra “wow” factor.
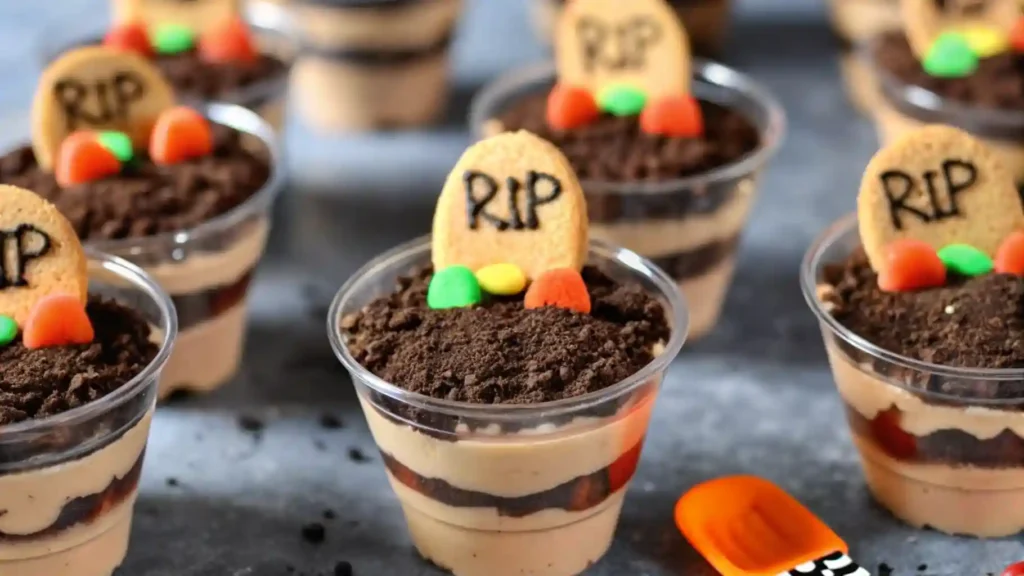
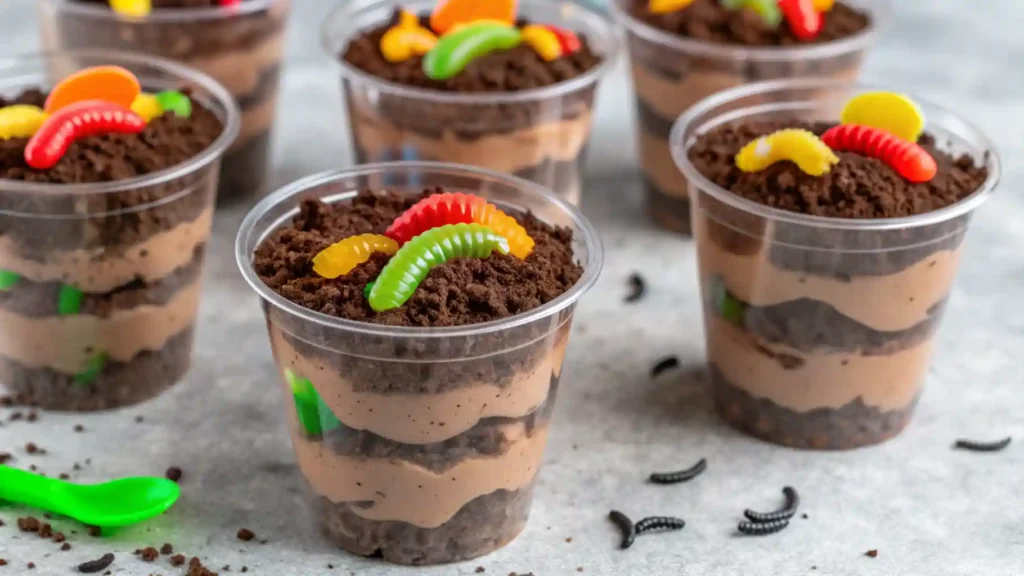
1. Classic Plastic Cups
The easiest way to show off those layered beauties. Use clear plastic cups to let everyone see the dirt, pudding, and whipped topping doing their thing. Bonus: no dishes.
2. Mason Jar Magic
Perfect for parties, picnics, or just impressing your inner food stylist. Layer everything in a small mason jar and screw on the lid. Add a ribbon if you’re feeling cute.
3. Big Bowl Bonanza
Feeding a crowd? Skip the individual cups and go big. A large trifle bowl or glass mixing bowl turns this into a communal dig-in dessert. Warning: may cause spoon duels over the last gummy worm.
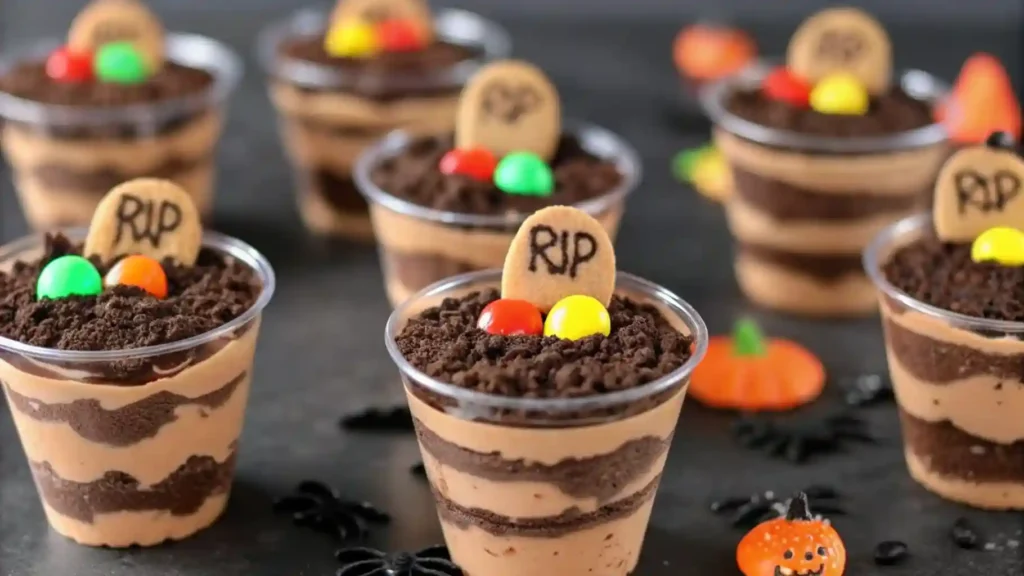
4. Dessert Shooters
For fancier gatherings, serve them in small dessert shooter glasses. Tiny spoons, tiny layers, big reactions. This version is all about the aesthetic.
5. Ice Cream Topping Hack
Craving something cold? Spoon your dirt cup mix over a scoop of vanilla ice cream. It’s basically dessert on dessert and no one’s mad about that.
Can I serve it warm?
Not really, this is a chill-and-serve dessert. The pudding needs cold milk to set, and the whipped topping will melt if it gets too warm. Room temp is okay, but fridge-cold is best
Flavor Variations Worth Trying
The classic dirt cup is perfect on its own, but if you’ve made it once, chances are you’ll want to riff on it next time. The good news? It’s almost impossible to mess this up. Here are some favorite twists that take this dessert from nostalgic to next-level.
Peanut Butter Cup Power
Swirl a tablespoon of peanut butter into the pudding before layering. Add chopped mini peanut butter cups between layers for full salty-sweet magic.
Mint Oreo Freshness
Swap regular Oreos for mint ones and add a few drops of peppermint extract to the pudding. It’s like your favorite after-dinner mint, but way more fun.
Fruit-Forward Fix
Layer sliced strawberries or bananas between the pudding and whipped topping. The fruit adds brightness and cuts the richness great for summer or brunch.
Double Chocolate Dream
Use chocolate pudding and add chocolate chips or fudge sauce between layers. Because if you’re going for chocolate, go all in.
Adults-Only Upgrade
Fold in a splash of Kahlúa, Baileys, or espresso into the pudding for a grown-up version that’s secretly decadent. Skip the worms or don’t. We won’t tell.
Can I make a healthy version?
You can lighten it up by using sugar-free pudding mix, light whipped topping, and almond milk. It won’t taste the same, but it’s still satisfying, especially if you add fresh fruit and skip the worms.
Tips and Tricks for Perfect Layers
Oreo Dirt Cups might be easy, but there’s an art to making them look (and taste) irresistibly good. These small details can turn your dessert from “cute” to “holy wow.”
Use Cold Milk — No Exceptions
Room-temperature milk will leave your pudding runny and sad. Cold milk sets the pudding fast, giving you that thick, spoonable texture that holds layers in place.
Oreo Crumb Combo = Texture Magic
Crush your cookies into a mix of super-fine and chunky crumbs. The fine crumbs give that “dirt” look, while the bigger bits offer satisfying crunch.
Clean Layers, Better Visuals
Want those Pinterest-perfect stripes? Use a piping bag or zip-top bag with the corner snipped off to layer your pudding and whipped topping cleanly. Tap the cup gently after each layer to even things out.
Gummy Worm Timing
Add worms right before serving. If they sit too long, they get soggy and weirdly shiny. You want them looking like they just wriggled in.
Want it Richer?
Mix a bit of softened cream cheese and powdered sugar into your whipped topping. It thickens the texture and adds a cheesecake-y vibe.
How do I fix runny pudding?
If your pudding didn’t set, it’s probably because the milk was too warm or you under-whisked. Chill it longer or whisk in a tablespoon of instant pudding mix if needed.
Storage and Make-Ahead Notes
The beauty of Oreo Dirt Cups? They’re as low-maintenance after assembly as they are to make. Whether you’re prepping for a party or saving leftovers (if there are any), here’s how to store them right.
Short-Term Storage (1–3 days)
- Fridge is your friend: Cover each cup with plastic wrap or use lidded containers to keep them fresh.
- Stack smart: If stacking in the fridge, place parchment or foil between cups to avoid crushed toppings.
- Add worms last-minute: If you’re serving the next day, wait until just before serving to add the gummy worms — they can melt or get too soft if left overnight.
Make-Ahead Game Plan
- Assemble the cups (minus the worms) up to 24 hours ahead.
- Chill covered in the fridge to let the flavors meld the cookie crumbs will soften slightly, creating that classic “dirt pudding” texture.
- For longer prep (like 2–3 days ahead), keep pudding and toppings separate, and assemble the day of.
Can I freeze them?
Technically, yes, but it’s not ideal. The pudding and whipped topping can separate once thawed. If you must freeze, use airtight containers and expect a slightly different texture when defrosted.
FAQs
Can I make Oreo dirt cups dairy-free?
Yes! Use plant-based milk (like almond, soy, or oat) with dairy-free instant pudding, and swap the whipped topping for coconut whip or another non-dairy option. Be sure your cookies are vegan, too. Some Oreo varieties are dairy-free, but always double-check.
Do I have to use gummy worms?
Nope. Gummy worms are optional, not essential they just bring the fun. You can skip them entirely, or swap them with fruit slices, candy rocks, or chocolate shavings for a more grown-up version.
Can I make this in a large bowl instead of individual cups?
Absolutely. Use a trifle bowl or clear glass dish and layer it just like you would in cups. This is perfect for potlucks or parties, just be sure to use a deep spoon when serving to keep the layers intact.
How long do dirt cups last in the fridge?
They stay fresh for about 3 days when stored covered in the fridge. Just remember to add the gummy worms at the last minute so they don’t get weird.
What if I don’t have instant pudding?
You’ll need to cook the pudding and let it fully cool before assembling. Or, cheat a little with chocolate mousse, custard, or even store-bought pudding cups in a pinch.
More Easy Halloween Recipes:
- Ghost Oreo Balls
- Halloween Chocolate Chip Cookies
- Halloween Oreo Cake Bars
- Peanut Butter Spider Cookies

Oreo Dirt Cup Pudding
Ingredients
Equipment
Method
- In a bowl, whisk the instant pudding mix with cold milk until smooth and thickened (about 2 minutes).
- Place Oreo cookies in a zip-top bag and crush with a rolling pin until you have a mix of crumbs.
- In serving cups or jars, layer crushed Oreos, pudding, and whipped topping. Repeat the layers as needed.
- Top with gummy worms, gently pressing them into the top layer.
- Cover and refrigerate for 30 minutes before serving, or serve immediately if desired.
Notes
Looking for more cooking and baking inspiration? Browse our Pinterest boards or join the conversation with us on Facebook.