You know that feeling when Halloween is creeping closer, and you’re craving something festive but not fussy? That’s where these peanut butter spider cookies come in. Equal parts adorable and addictive, they’re everything you love about classic peanut butter cookies, soft, chewy, and rich, with a playful, spooky twist that instantly makes them party-ready.
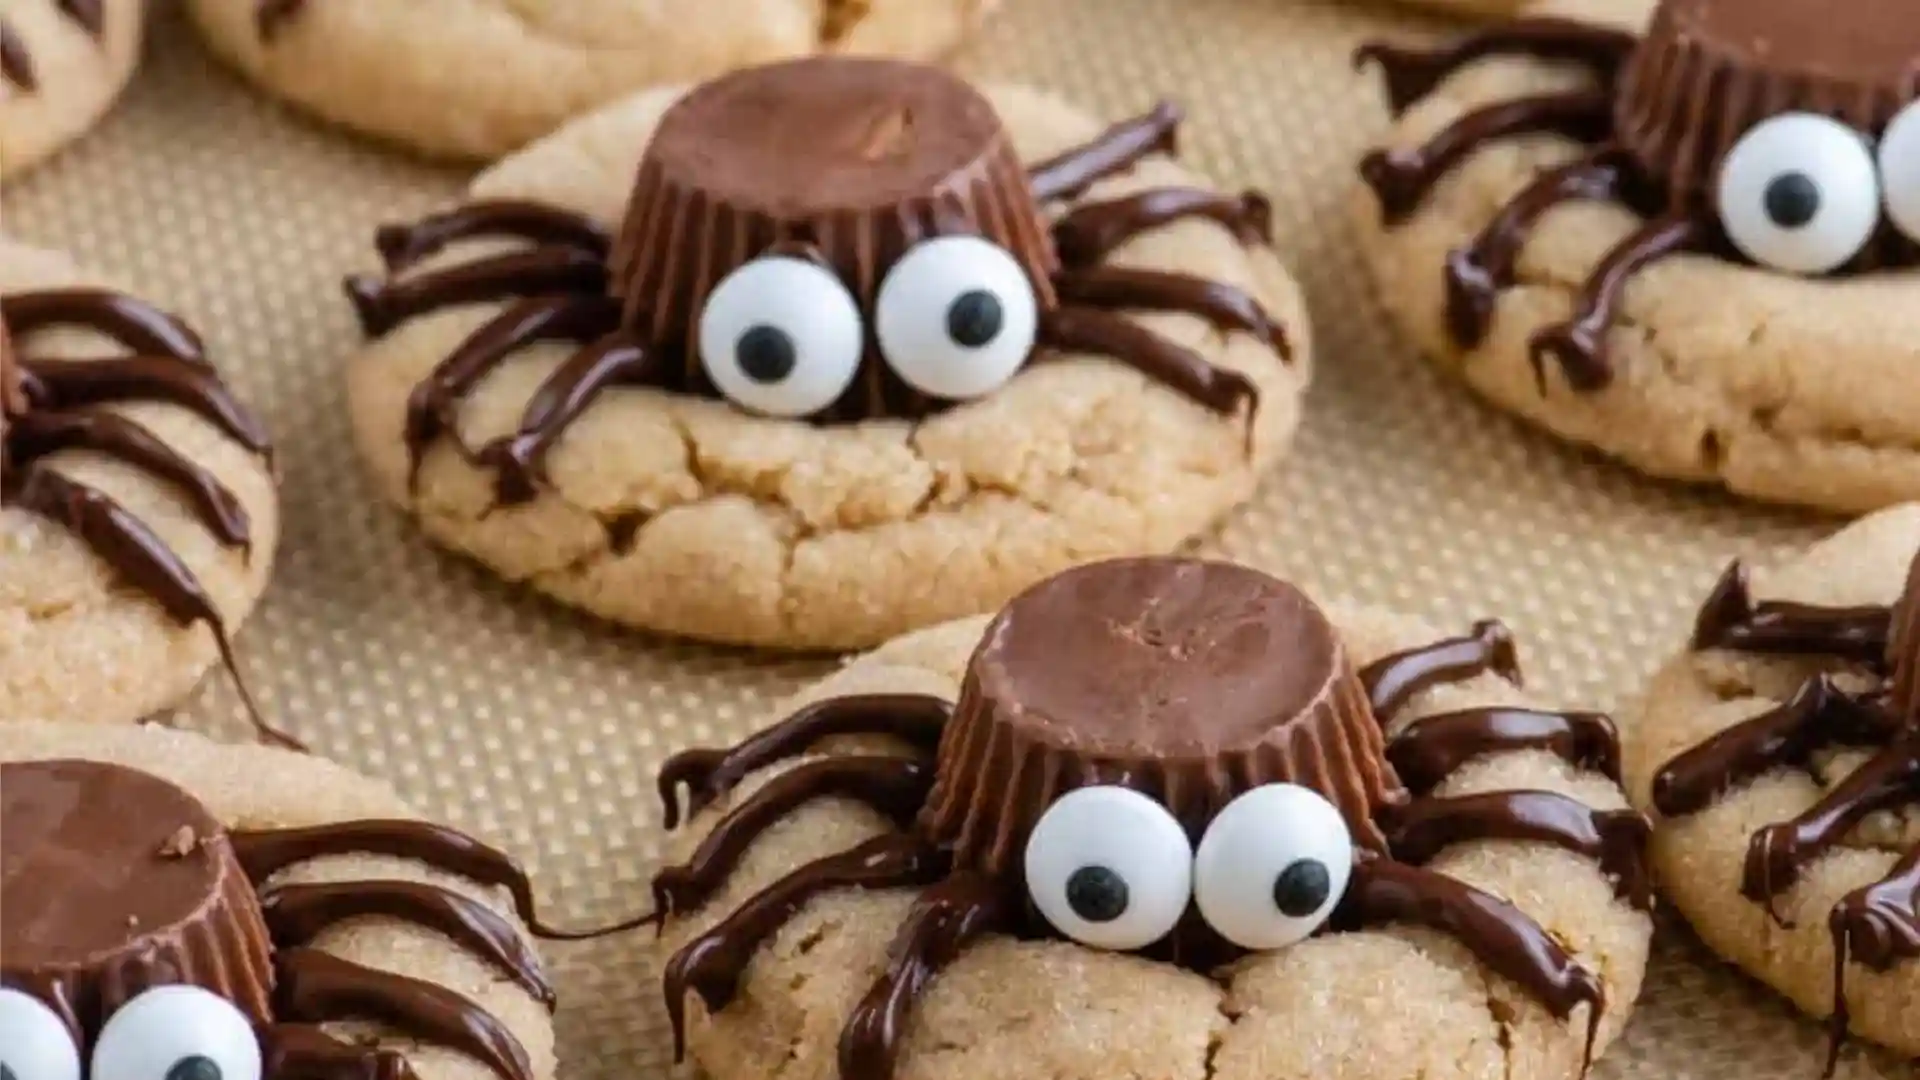
This isn’t your average “just pipe some frosting on a cookie and call it spooky” situation. Nope. These spiders are legit: each cookie is topped with a mini Reese’s (yes, that gooey peanut butter magic), plus licorice legs and candy eyes that practically beg for attention. And the best part? You don’t need fancy decorating skills or a pantry full of ingredients to pull this off.
Whether you’re baking with kids, prepping for a Halloween bash, or just need a break from pumpkin spice overload, these cookies hit that rare sweet spot of festive and foolproof. In this recipe, I’ll walk you through every step, from the dough to the final (adorably creepy) assembly, and throw in tips, shortcuts, and a few sneaky variations along the way.
By the end, you’ll not only have a tray full of crowd-pleasers, but you might just become that person who brings “those amazing spider cookies” to the party.
Ingredients and Tools for Easy Peanut Butter Spider Halloween Cookies
These peanut butter spider cookies don’t rely on gimmicks; they’re built on real, rich peanut buttery goodness and finished with a dash of Halloween whimsy. Everything you need is probably already in your kitchen (minus maybe the black licorice).
Ingredients
- 1 ⅓ cups all-purpose flour – spooned and leveled for accuracy
- 1 tsp baking soda – helps the cookies puff and hold their shape
- ½ tsp salt – balances the sweetness
- ½ cup creamy peanut butter – go for the good stuff, not the oily natural kind
- ½ cup unsalted butter, softened – room temp makes all the difference
- ½ cup granulated sugar – for structure and sweetness
- ½ cup packed brown sugar – adds chewiness and depth
- 1 large egg – binds everything together
- 1 tsp vanilla extract – a subtle flavor booster
- 24 mini Reese’s peanut butter cups – frozen for 10 minutes so they hold their shape
- Black licorice laces or black string Twizzlers – for the “legs”
- Candy eyes (optional) – but highly recommended for maximum cuteness
Quick Tip: Want to make these cookies gluten-free? Sub the flour with a 1:1 gluten-free baking mix and double-check your candy ingredients.
Equipment Checklist
- Mixing bowls (at least 2 – one for wet, one for dry)
- Hand or stand mixer (or a whisk and strong forearms)
- Rubber spatula or wooden spoon
- Measuring cups and spoons
- Baking sheets (preferably 2 for batch baking)
- Parchment paper or silicone baking mats
- Cooling rack
- Sharp knife or kitchen scissors (for trimming licorice)
You don’t need fancy tools to bring these spider cookies to life, just a few baking basics and a little creative spirit.
Can I Use Natural Peanut Butter in Spider Cookie Dough?
Technically, yes, but here’s the catch: natural peanut butter tends to separate and can throw off the dough’s texture. For best results, use a no-stir, creamy brand (like Jif or Skippy) for structure and flavor.
Step-by-Step Guide to Making Peanut Butter Spider Cookies for Halloween
This recipe isn’t just fun to eat, it’s fun to build. Think of it like edible crafting: easy steps, playful details, and no need for piping bags or sculpting tools. Here’s how to make these spooky-sweet peanut butter spider cookies from scratch:
Step 1: Prep the Dough
Preheat your oven to 350°F (175°C) and line two baking sheets with parchment paper.
In a medium bowl, whisk together:
- 1 ⅓ cup all-purpose flour
- 1 tsp baking soda
- ½ tsp salt
Set aside. In a large mixing bowl, beat:
- ½ cup unsalted butter (softened)
- ½ cup creamy peanut butter
- ½ cup granulated sugar
- ½ cup packed brown sugar
Mix for 2–3 minutes until light and fluffy. Add in:
- 1 large egg
- 1 tsp vanilla extract
Blend again until smooth. Gradually add the dry ingredients to the wet mix. Stir just until no streaks of flour remain. Don’t overmix, we want chewy, not cakey.
Step 2: Shape and Bake
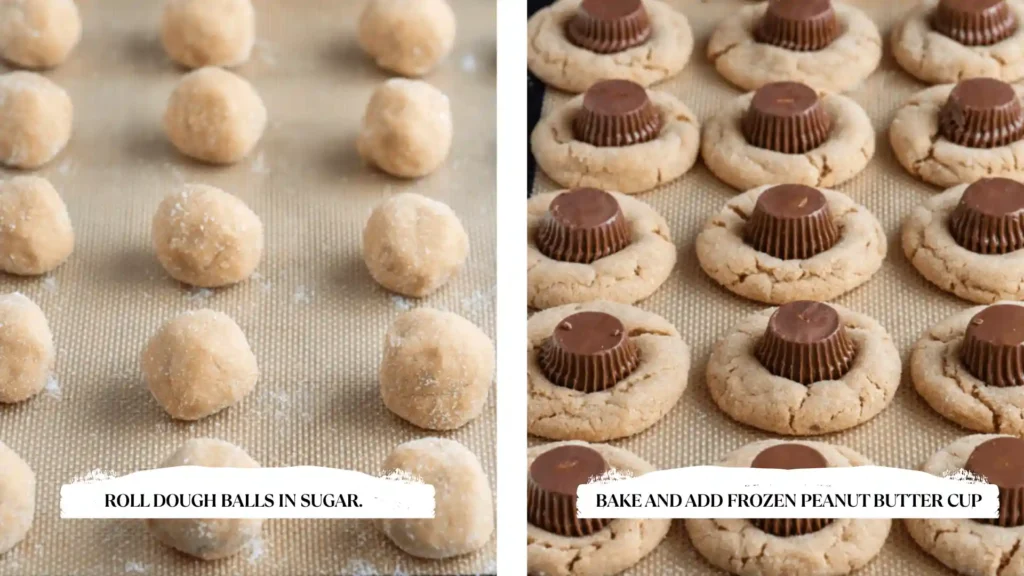
Scoop the dough into tablespoon-sized balls and roll them between your hands. Space them about 2 inches apart on the baking sheets. Gently press each ball down just a little to flatten the tops.
Bake for 8 to 10 minutes, or until the edges look set but the centers are still soft. (Yes, they’ll finish cooking on the tray. That’s how you get that perfect chew.)
Step 3: Add the Spider “Body”
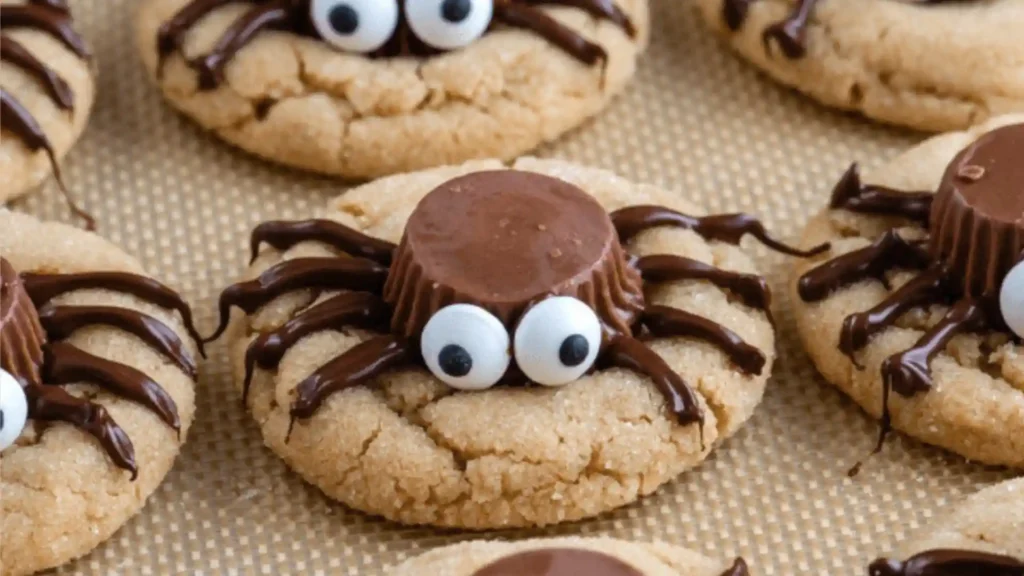
As soon as the cookies come out of the oven, press a mini Reese’s peanut butter cup into the center of each one. (Freezing the cups for 10 minutes beforehand helps them keep their shape.)
Let the cookies rest on the baking sheet for about 10 minutes; this gives the Reese’s time to slightly melt and fuse with the cookie base.
Step 4: Assemble the Spider
While the cookies cool:
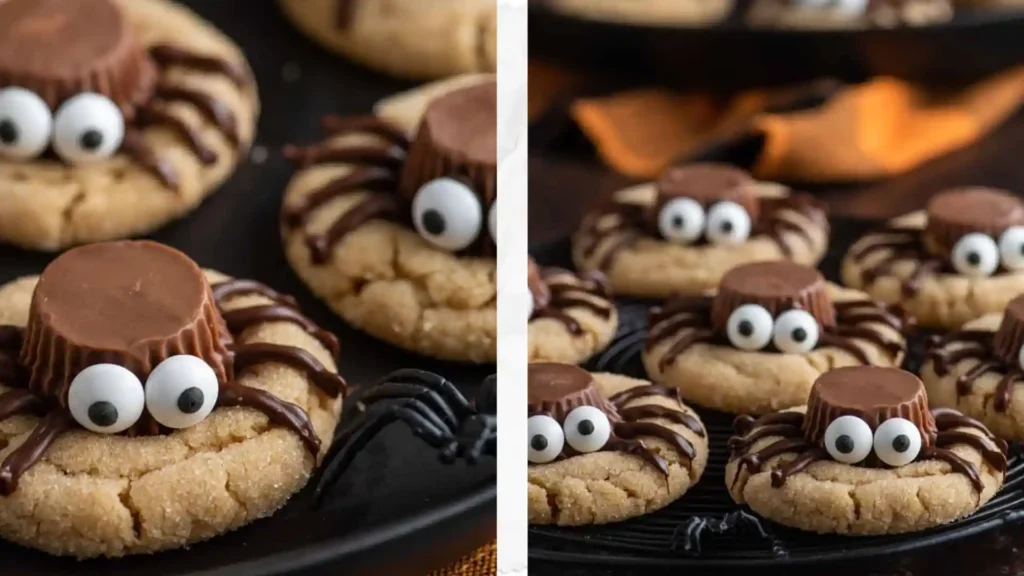
- Cut black licorice laces into 2-inch lengths. You’ll need 8 legs per cookie.
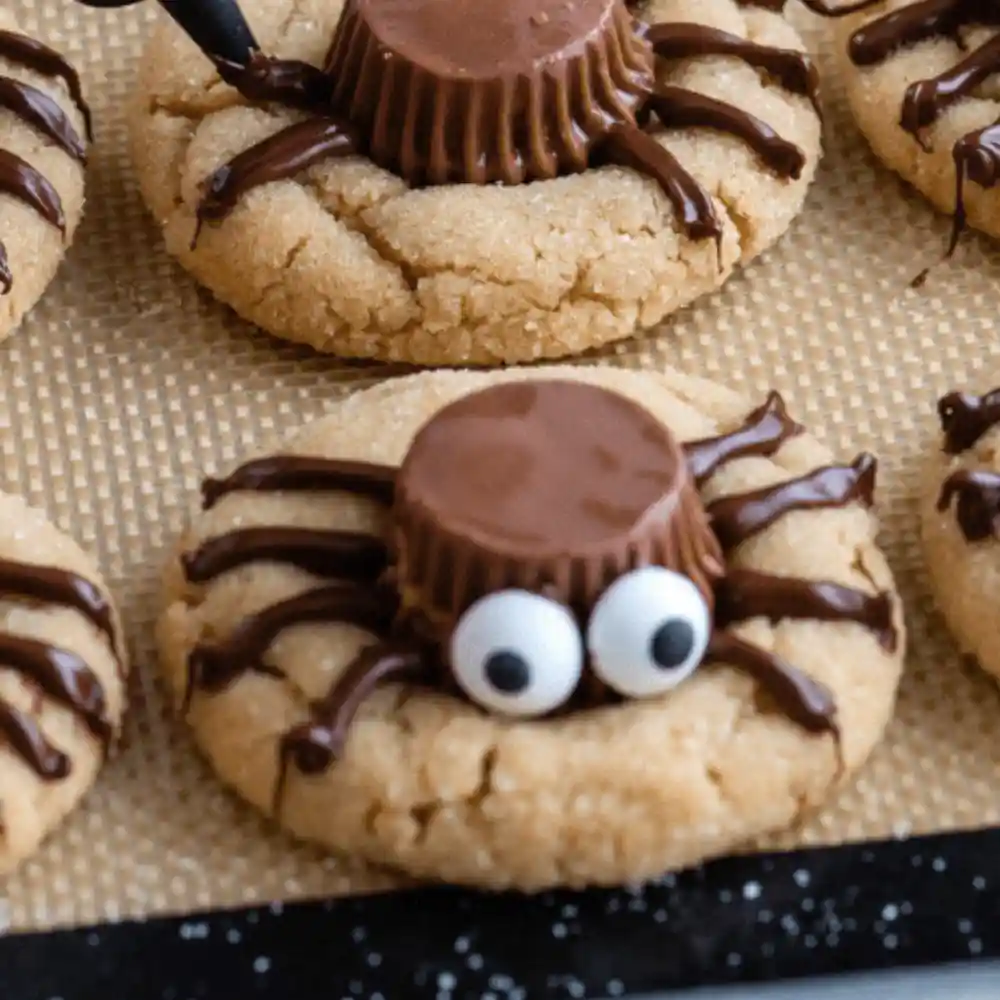
- Once the cookies are warm but not hot, gently press 4 licorice “legs” into each side of the Reese’s cup.
- Add candy eyes on top using a dab of melted chocolate or icing to hold them in place (optional—but let’s be honest, they make the whole look).
Can I Make These Ahead of Time?
Yes! You can bake the cookies (without the decorations) a day or two in advance. Add the Reese’s and spider details the day you serve them for the best texture and presentation.
Spider Cookie Variations and Pro Baking Tips for Halloween Treats
Let’s be real, half the fun of making peanut butter spider cookies is getting creative with them. Here are a few tweaks and tricks to help you nail the look and the flavor, plus options for dietary needs or artistic flair.
Cookie Crafting Tips
- Freeze the Reese’s cups before using. Just 10 minutes in the freezer helps them stay firm when pressed into warm cookies.
- Use kitchen scissors for licorice. Makes cutting the legs way easier and cleaner.
- Add the legs while the cookies are still warm. This helps them embed slightly and stay put.
- Keep it cool. If your kitchen is warm, assemble spiders quickly or move finished cookies to the fridge to set.
Halloween-Ready Variations
- Use chocolate drizzle for legs: Pipe melted dark or milk chocolate in leg shapes instead of using licorice.
- Swap in mini Oreos: Want a different flavor? Use a mini Oreo or a chocolate truffle in place of the Reese’s cup.
- Go vegan: Use plant-based butter, flax egg (1 tbsp ground flax + 3 tbsp water), and check candy labels for animal-free versions.
- Make them gluten-free: Sub in a 1:1 gluten-free baking flour (like Bob’s Red Mill or King Arthur) — no extra adjustments needed.
Creative Add-On Ideas
- Add a dab of raspberry jam beneath the Reese’s cup for a “spooky surprise” center.
- Use edible glitter or gold sprinkles on the legs for glam spiders (hello, witch-themed party snacks).
- Pipe mini webs onto the plate using white chocolate or icing for a fun serving display.
Do I Have to Use Licorice for the Legs?
Not at all! If you’re not a fan of black licorice, swap it with:
- Pretzel sticks (for crunchy legs)
- Chocolate Pocky sticks (tasty + neat)
- Thin piped chocolate (more delicate, artsy look)
The key is to have contrast and a little flair—your spiders, your rules.
How to Serve and Store Peanut Butter Spider Halloween Cookies
Freshly baked, slightly warm, and oozing peanut butter goodness, that’s the ideal moment to serve these spider cookies. But don’t worry, they keep their charm (and chewiness) for days. Here’s how to store, serve, and even prep ahead without a hitch.
When to Serve These Spider Treats
These cookies are crowd-pleasers at:
- Halloween parties (obviously)
- Classroom bake sales
- Spooky movie nights
- Or just a “because it’s fall and I can” baking moment
They’re fun to make with kids, but just as delightful when made solo with your favorite playlist and a glass of cider.
Bonus: Stack a few in a clear treat bag with a ribbon for the cutest edible gift ever.
Storage Tips That Work
- Room temp: Store in an airtight container for up to 5 days. Layer with parchment paper if stacking.
- Fridge: Not necessary, but it helps if your home is extra warm. Just let them come back to room temperature before serving.
- Freezer: Freeze undecorated cookies for up to 2 months. When ready to serve, thaw at room temperature and add the Reese’s and spider decor the same day for best results.
Can I Freeze the Assembled Spider Cookies?
Technically, yes, but here’s the deal: Licorice can get brittle in the freezer, and candy eyes sometimes lose their charm when thawed. For a perfect presentation, freeze the baked cookie base, then decorate it fresh.
FAQs
Can I make the dough ahead of time?
Yes! You can refrigerate the dough for up to 48 hours before baking. Just bring it back to room temp for 15–20 minutes so it scoops easily.
What if I can’t find mini Reese’s cups?
No problem. Try:
- Mini Oreos
- Rolo candies
- Chocolate truffles
- Even a spoonful of Nutella piped into the center
Anything round-ish and rich works as a spider’s “body.”
My Reese’s are melting too much. Help?
Freeze them for at least 10 minutes before baking. Also, press them into the cookies immediately after baking, not before. If they’re still melting too fast, your cookies might be too hot; wait 1–2 minutes post-bake before adding.
How can I keep the spider’s legs from falling off?
Two tricks:
- Press licorice into the warm cookie while it’s still soft.
- Use melted chocolate or frosting as edible glue if the cookie has cooled too much.
Can I double the recipe?
Absolutely. This dough scales up well. Just make sure your mixer can handle it, or split the batch into two mixing rounds to avoid overworking the dough.
You May Also Like: Pumpkin Brownie recipe, White Chocolate Spiderweb Brownies
Peanut Butter Spider Cookies
Ingredients
Equipment
Method
- Preheat oven to 350°F (175°C) and line baking sheets with parchment paper.
- In a medium bowl, whisk together flour, baking soda, and salt. Set aside.
- In a large bowl, beat together butter, peanut butter, granulated sugar, and brown sugar until creamy. Add egg and vanilla; mix until combined.
- Gradually add dry ingredients to the wet, mixing just until combined. Do not overmix.
- Roll dough into 1-tablespoon balls and place on prepared sheets. Slightly flatten each ball.
- Bake for 8–10 minutes until just set. Immediately press a mini Reese’s into the center of each warm cookie.
- Cool for 5–10 minutes. Add licorice legs (4 on each side) and candy eyes while the cookies are still soft.
- Let cookies cool completely on a wire rack before serving or storing.
Notes
Follow me on Pinterest for more delicious recipes and culinary inspiration – your best source for tasty, shareable food ideas!

