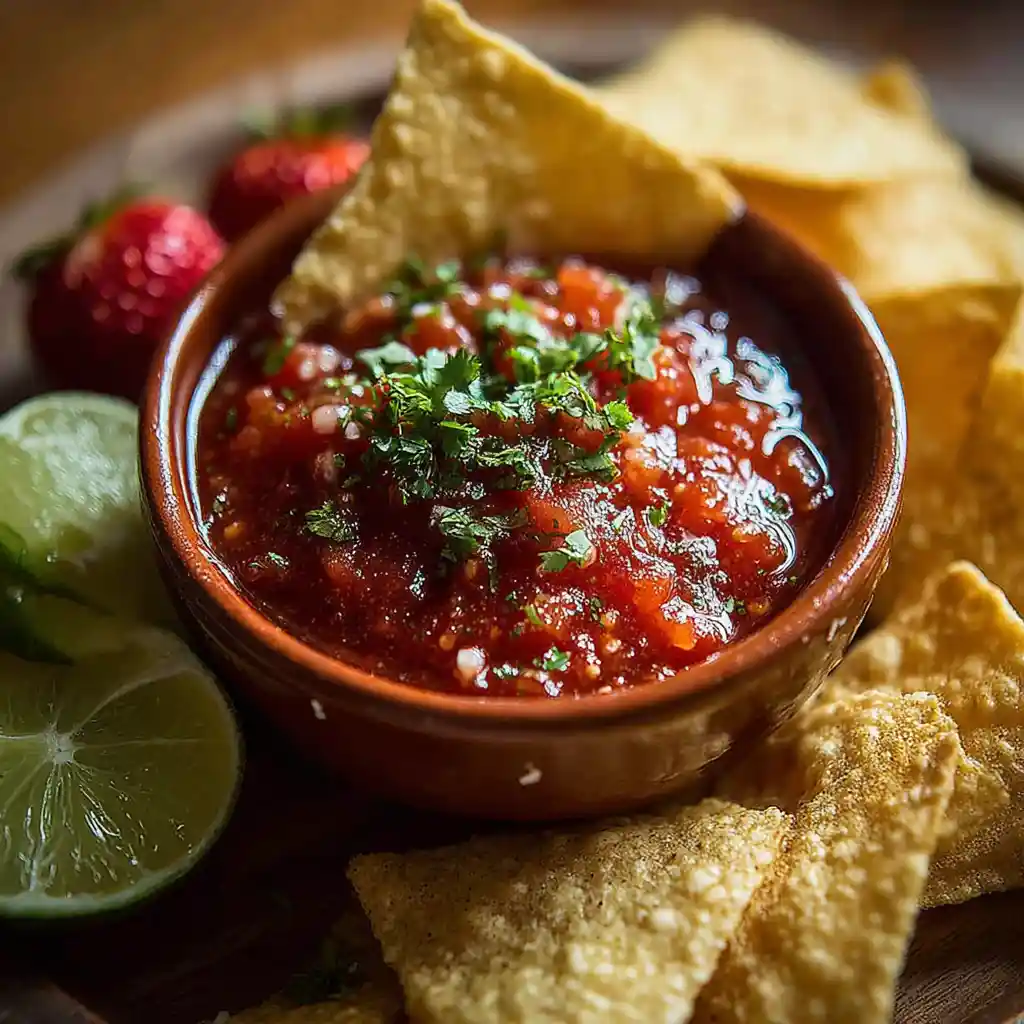
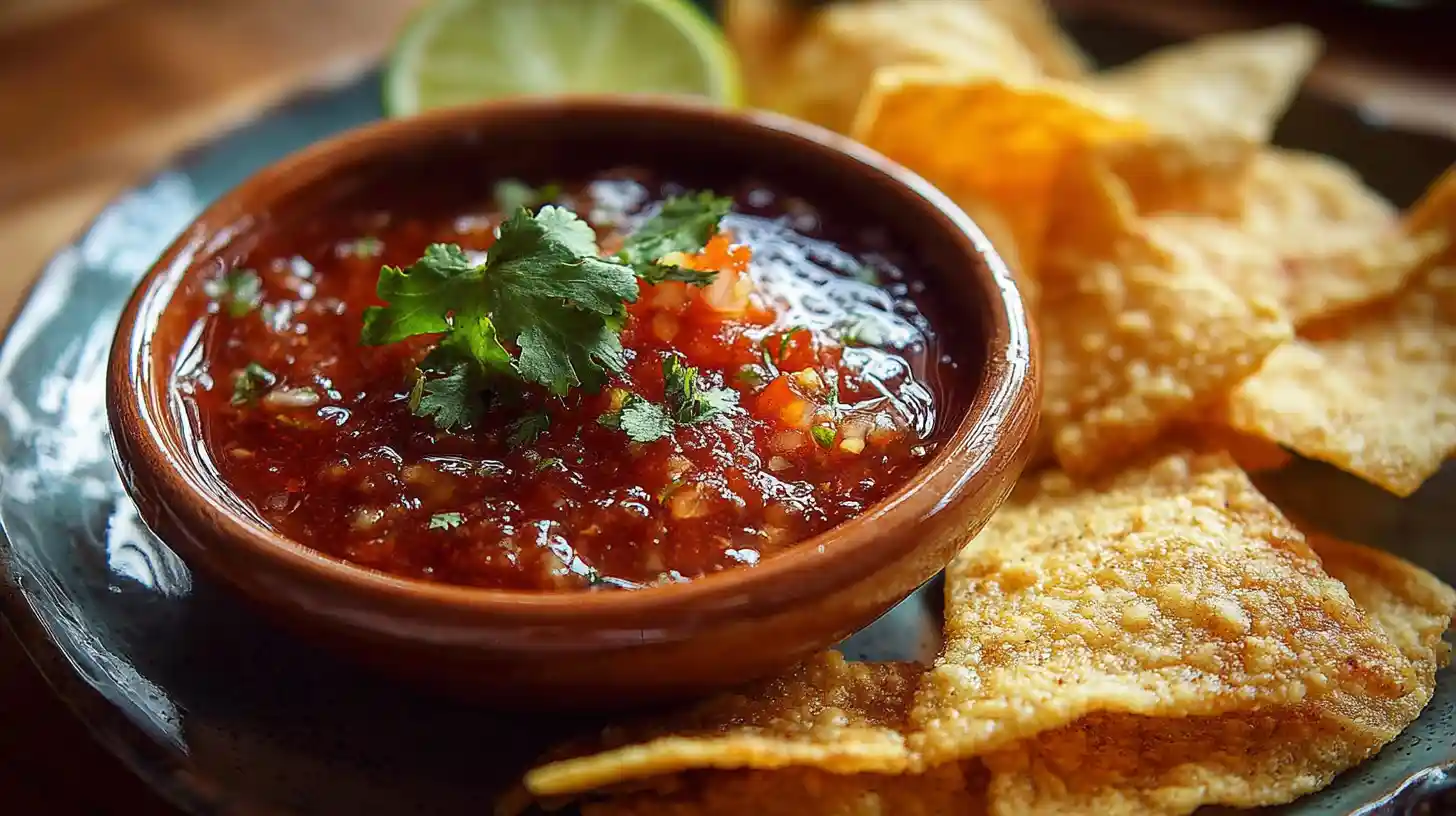
Let’s be real, nothing beats the taste of homemade Restaurant-style salsa made from scratch. No preservatives, no weird aftertaste, just ripe tomatoes, a little jalapeño heat, sharp onion, fresh cilantro, and that magic balance of tangy, spicy, and sweet. It’s the kind of dip that doesn’t need an excuse. Chips? Sure. Tacos? Definitely. Honestly, you’ll start making up reasons to spoon it onto everything.

Out of all my salsa recipes, this is the one I keep coming back to, and I have a feeling you will too.
Table of contents
- Why Restaurant-Style Salsa Hits Different
- Restaurant-Style Salsa Ingredients You’ll Need
- How to Make Restaurant-Style Salsa at Home
- Customizing Your Homemade Salsa: Heat, Texture, and Taste
- How to Store Restaurant-style Salsa and Make It Ahead
- Pro Tips for the Best Restaurant-style Salsa Flavor
- Conclusion
- FAQs
Why Restaurant-Style Salsa Hits Different
There’s a reason people devour baskets of chips at Mexican restaurants before the entrées even arrive. It’s not just the crunch, it’s the salsa. That stuff feels like it was made five minutes ago, even when it wasn’t. It’s bright, balanced, and oddly addictive.
So, what gives it that edge? A few things:
- Flavor layering: Good restaurant salsas don’t just taste like tomatoes. They hit you with acidity (lime), depth (garlic and cumin), and that grassy zing from fresh cilantro.
- Smooth but not soupy: The texture walks a tightrope, no huge tomato chunks, but not a puree either. Just scoopable bliss.
- Just the right heat: Enough to make your mouth perk up, but not enough to make you regret that third chip.
- Salt-savvy: Most home salsas skimp on salt. Don’t. That dash of salt wakes up every other flavor.
Emotionally? This Restaurant-style salsa taps into something primal. It’s the taste of shared tables, casual dinners, and late-night snacks. It’s low-effort comfort with high payoff. And once you taste the homemade version, you’ll wonder why you ever settled for store-bought.
What makes restaurant salsa taste better than jarred salsa?
Restaurant salsas often use fresher ingredients, skip preservatives, and strike a better balance between acid, spice, and salt. Texture also plays a big role; they’re usually smoother and more scoopable than chunky jarred versions.
Restaurant-Style Salsa Ingredients You’ll Need
This salsa’s brilliance lies in its simplicity. No roasting. No stovetop. Just a few key ingredients tossed into a blender. But the secret? It’s in how you use them and the tiny tweaks that make it yours.
Core Ingredients:
- Canned tomatoes (28 oz) – Fire-roasted if possible, for depth.
- Fresh onion (½ medium) – White for bite, yellow for sweetness.
- Garlic (2–3 cloves) – Raw and sharp, but tamed in the mix.
- Fresh jalapeño (1) – Seeds in = more heat. Up to you.
- Fresh cilantro (½ cup) – Don’t skip. Seriously.
- Fresh lime juice (1 tbsp) – Brightens everything.
- Sugar (½ tsp) – Just a pinch to round out acidity.
- Ground cumin (¼ tsp) – Adds warmth and that “restaurant” depth.
- Salt (½ tsp to taste) – Start here, adjust after blending.
Optional but Genius Add-Ins:
- A splash of tomato juice (if using fresh tomatoes or for thinning).
- A canned chipotle pepper in adobo for smoky heat.
- Green onions for extra zip.
- A dash of red wine vinegar if your tomatoes taste flat.
This is your sandbox. Want a bolder garlic kick? Add another clove. Hate cilantro? Leave it out (though, let’s be real, it’ll miss that grassy brightness). This recipe is a starting line, not a finish line.
Can I use fresh tomatoes instead of canned?
Absolutely. Use about 8–10 Roma tomatoes (seeded if you prefer less water) and add a bit of tomato juice to smooth it out. Just know: canned fire-roasted tomatoes often bring deeper flavor with less fuss.
How to Make Restaurant-Style Salsa at Home
Here’s the best part: this Restaurant-style salsa doesn’t care how tired or rushed you are. No chopping finesse, no stovetop, no waiting. Just dump, blend, taste, and boom, you’re done.
Step-by-Step Instructions:
- Prep (barely)
- Roughly chop your onion and jalapeño. Peel the garlic. That’s it.
- Load the blender or food processor
- Add onion, garlic, jalapeño, cilantro, cumin, salt, sugar, and lime juice first.
- Then pour in the canned tomatoes last, trust me, it blends better that way.
- Pulse and taste
- Start with a few quick pulses to break things up.
- Then blend to your desired texture, smooth, chunky, or somewhere in between.
- Dip a spoon (or a chip, no judgment) and taste. Adjust salt, lime, or heat as needed.
- Chill (optional, but recommended)
- Let it sit for 30 minutes to let the flavors meld, especially if you’re using raw onion.
- But if you’re hungry? Go for it immediately. You won’t regret it.
BTW, you really can’t mess this up. Too spicy? Blend in a little sugar or more tomatoes. Too flat? Salt or lime will wake it up. Your taste buds are the final authority.
Do I need a food processor, or will a blender work?
Either works just fine. A food processor gives more control over texture, while a high-speed blender might make things ultra-smooth. If your blender needs more liquid, add a splash of tomato juice or water.
Customizing Your Homemade Salsa: Heat, Texture, and Taste
No two batches of salsa should ever taste the same. That’s not a flaw, that’s the charm. Real ingredients shift with the seasons. Your cravings change with the day. So let’s treat this salsa like a living recipe, meant to be played with, not just followed.
Tweak the Heat: Chill or Thrill?
- Keeping it mild? Ditch the seeds and white ribs from your jalapeño. Or swap in a green bell pepper if spice isn’t your jam.
- Feeling bold? Keep the seeds or toss in an extra jalapeño.
- Chasing fire? Serranos. Chipotles in adobo. Maybe even a splash of hot sauce. Just… maybe taste as you go.
Heads up: Salsa gets hotter the longer it sits. What seems tame now might punch back tomorrow.
Smooth Moves or Rustic Charm?
- Super smooth = Blend until creamy, almost like a thin sauce.
- Chunky charm = Just pulse it — short bursts. Stop before it turns soupy.
- Split the difference? Easy. Start with chunks, blend a little more if needed. You’re the boss.
Taste Balance: When Something Feels… Off
Sometimes your salsa just doesn’t sing. It hums, maybe, but doesn’t hit.
- Too sour or sharp? A pinch of sugar can mellow that acidity.
- Too flat? Add salt. Then lime. Then maybe a whisper of vinegar if it still feels muted.
Let’s not pretend ingredients are robots. Jalapeños don’t come with a warning label. Tomatoes change with the weather. Some batches just need a little coaxing, and that’s where you shine.
What if my salsa comes out bitter?
It happens. Raw garlic can be sharp, or maybe your tomatoes were underripe. Blend in half a ripe tomato, add a pinch of sugar, or splash in some extra lime. Bitterness doesn’t mean it’s ruined, just that it needs a nudge.
How to Store Restaurant-style Salsa and Make It Ahead
You made a batch. Maybe even a double batch (smart move). Now what? Whether you’re prepping for a party, a week of snacking, or just making sure your fridge always has something exciting in it, here’s how to keep your salsa tasting just-made.
Fridge Storage (Short-Term Hero)
- Shelf life: 5 to 7 days in an airtight container.
- Flavor tip: It tastes better after a few hours. The lime, garlic, and jalapeño mellow and marry, like they’ve had a good conversation overnight.
- Texture note: Salsa can separate slightly in the fridge. Just stir it, problem solved.
Freezer-Friendly? Surprisingly, Yes.
- Pour it into a mason jar or freezer-safe container. Leave some space at the top for expansion.
- Freeze for up to 3 months.
- Thaw overnight in the fridge before using. You might notice a touch of extra water; just stir or strain if needed.
Make-Ahead Strategy
- Hosting a party? Make it the day before; the flavors deepen.
- Meal prepping? Freeze in small portions so you can defrost just what you need.
- Last-minute cravings? Keep one batch in the fridge, another in the freezer. You’re future-proofing your snack life.
Let’s be honest: there are few things more satisfying than realizing you already have salsa ready when the craving hits.
Can I can this salsa for long-term storage?
This recipe isn’t formulated for safe canning (too much variation in acidity). If you’re interested in preserving it long-term, look up recipes specifically tested for home canning, or stick with freezing for now.
Pro Tips for the Best Restaurant-style Salsa Flavor
Once you’ve nailed the basics, the real fun begins: leveling up. These little moves might seem small, but together they’ll take your salsa from “pretty good” to “whoa, did you make this?!”
Go Fire-Roasted (Every Time)
If you’re using canned tomatoes, grab the fire-roasted kind. That slight smokiness mimics the char you’d get from roasted veggies, and it’s restaurant depth in a can.
Add Layers, Not Just Ingredients
- A splash of red wine vinegar: Cuts through richness with just a hint of acidity.
- A few green onions: They bring bite and brightness.
- Roasted garlic: Sweeter and rounder than raw.
- A touch of chipotle powder: Subtle smoke, zero chopping.
Temperature Tweaks Matter
Some people love salsa cold from the fridge. Others prefer it room temp, where the flavors bloom more fully. Try both, you might be surprised how much temperature changes the experience.
Play With Citrus
Lime is the default, sure. But ever tried a splash of orange juice? Or even a little zest? Citrus adds aroma and freshness that balances the richness of tomatoes.
Trust Your Palate
Every salsa recipe, this one included, is just a map. You’re the traveler. If it tastes a little off, don’t hesitate to adjust. Salt, acid, sweetness, spice: they’re your four dials.
What’s the secret to “that restaurant flavor”?
It’s a combination of smooth texture, balanced acidity, a hint of smoky depth (like fire-roasted tomatoes or chipotle), and just enough salt to make the flavors pop. Restaurants often blend in small flavor boosters, vinegar, roasted garlic, and even MSG, to get that craveable punch.
Conclusion
There’s something satisfying about taking a handful of humble ingredients, tossing them in a blender, and ending up with a salsa that could sit proudly on any restaurant table. No preservatives, no mystery flavoring, just bold, fresh, totally-you salsa.
Whether you’re whipping this up for taco night, sneaking a late-night chip dip, or just craving that hit of acid and heat we all secretly love, now you’ve got a go-to recipe that flexes with your mood.
And hey, if it doesn’t turn out perfect the first time? That’s half the fun. Tweak it. Taste again. Own it. You’ll never go back to store-bought once you realize how much better your version can be.
Now go grab those chips, or better yet, make some fresh ones. You’ve earned it.
FAQs
Why Is There Sugar in Restaurant-style salsa?
Great question. A tiny pinch of sugar helps round out the natural acidity of tomatoes and lime juice. Think of it less as “sweetening” and more like balancing, especially if your tomatoes are on the sharper side. You can skip it if your salsa tastes perfect without it.
I don’t like a watery salsa. How can I make this thicker?
There are a few easy fixes:
- Use less liquid when blending (drain your canned tomatoes first).
- Pulse instead of fully blending to keep some texture.
- Stir in a spoonful of tomato paste if you’ve already blended and it’s too runny.
- Chill it, cold salsa tends to thicken slightly as it sits.
Any of these will give you a heartier scoop without sacrificing flavor.
Can This Restaurant-Style Salsa Be Canned Safely?
Short answer: no, not safely. This recipe hasn’t been tested for the proper acidity levels needed for canning. If you’re into preserving salsa long-term, look for recipes specifically designed for home canning with pH-tested ratios. For now, stick with freezing or refrigerating; both are safe and easy.
Restaurant-Style Salsa
Ingredients
Equipment
Method
- Add onion, jalapeño, garlic, cilantro, cumin, salt, sugar, and lime juice to a food processor.
- Top with canned tomatoes and pulse until roughly combined. Blend to desired texture, smooth or slightly chunky.
- Taste and adjust seasoning: add more lime for brightness, salt for punch, or sugar to mellow acidity.
- Chill for at least 30 minutes for best flavor. Stir before serving.
Notes
Follow me on Pinterest for more delicious recipes and culinary inspiration, your best sources for tasty, shareable food ideas!