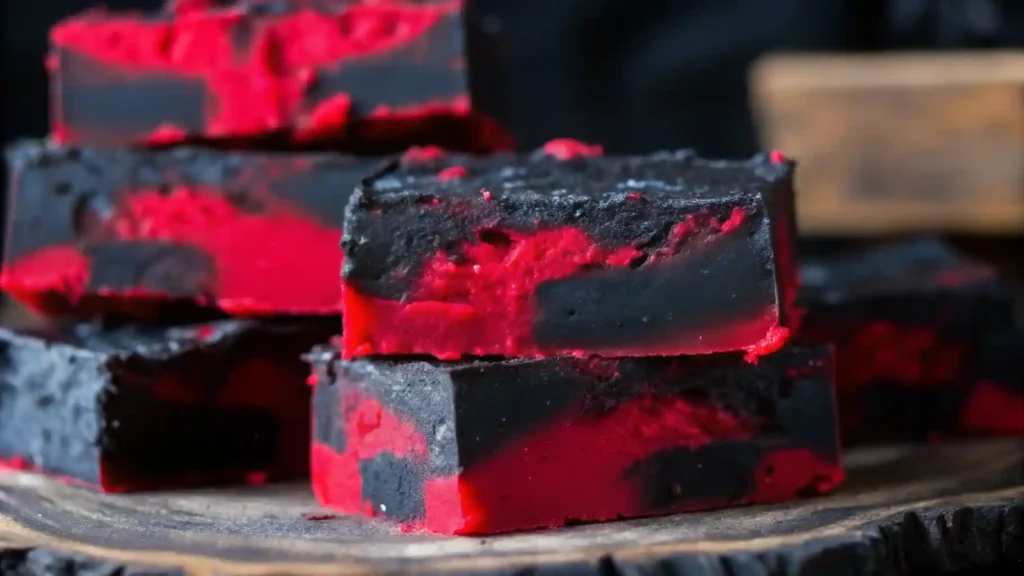
Looking for a Vampire Fudge recipe that’s spooky, dramatic, and shockingly simple? You’ve just found it. With blood-red swirls, rich black layers, and a melt-in-your-mouth texture, this Halloween treat is guaranteed to haunt your dessert table in the best way.
Halloween isn’t just for kids. There’s something universally thrilling about the eerie glow of jack-o’-lanterns, the rustle of leaves underfoot, and yes… the excuse to indulge in dramatic, over-the-top desserts.
This Vampire Fudge recipe is perfect when you’re short on time but still want to impress—no candy thermometers, no stovetop drama, just three ingredients, and a little bit of microwave magic. Whether you’re hosting a party, prepping goodie bags, or surprising your coworkers with themed sweets, this recipe is equal parts creepy and creamy.
Coming up: how to make it, how to swirl it like a pro, and clever ways to gift or serve it. Ready to sink your teeth in?
Why You’ll Love This Vampire Fudge Recipe
Let’s pause for a sec. Why choose this vampire fudge over the million other Halloween treats flooding your Pinterest feed? Because it checks every box: festive, fast, foolproof.
- Zero guesswork. No boiling sugar. No soft-ball stage. Just melt, mix, and chill.
- Three ingredients. That’s it. You probably already have them or can grab them on one grocery run.
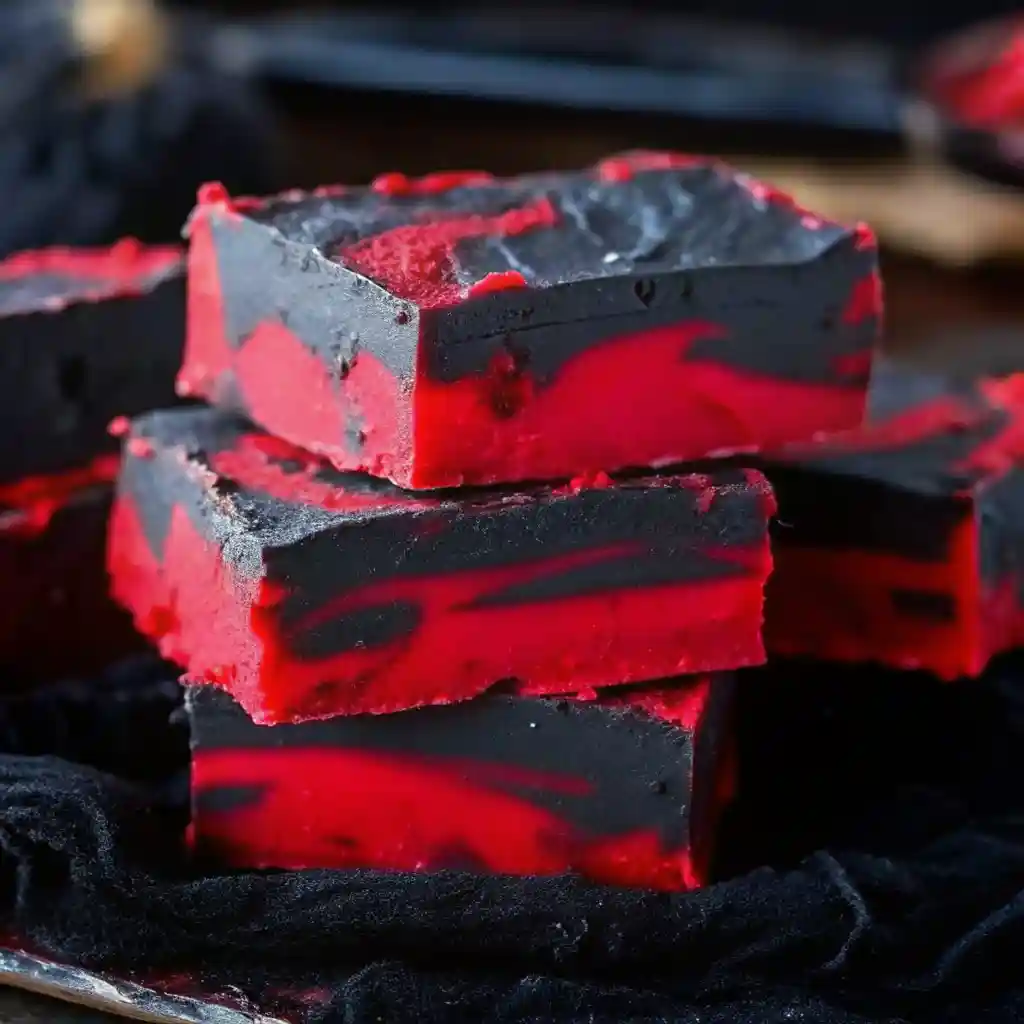
- Gorgeous results. That red-and-black swirl? It looks like you spent hours; no one has to know it took ten minutes.
- Kid and adult approved. Sweet but not too sweet, spooky but not scary. Great for class parties or grown-up gatherings.
- Freezer-friendly. Make it ahead, store it in the fridge, and serve it straight from the fridge — it holds its shape like a champ.
Here’s the real kicker: it’s the kind of recipe that becomes tradition. The one the kids beg for every October. The one you whip up even when you’re exhausted because… well, it’s that easy.
Is it fudge or candy?
Technically, this falls into the “no-bake candy fudge” category. It mimics traditional fudge texture but skips the stovetop work. That makes it perfect for beginners or anyone short on time.
Ingredients for Vampire Fudge Recipe
This vampire fudge recipe keeps it blissfully simple, no fancy tools, no obscure candy science. Just three main ingredients and a little optional food coloring magic.
Main Ingredients:
- 1 cup red candy melts – For that bold, blood-red base. Wilton or Mercken’s work is great.
- 1 cup black candy melts – Adds contrast and Halloween flair. Want deeper black? Add oil-based black food dye.
- 16 oz can of cream cheese frosting – Store-bought is fine. You’ll melt this to act as your fudge binder.
Note: Don’t use water-based dye — it’ll cause your candy melts to seize. Oil-based gel or powder is your best friend here.
Equipment Checklist:
- 2 small microwave-safe bowls
- 8×8-inch square baking pan
- Parchment paper (cross-lined for lift-out ease)
- A spatula or a spoon for mixing
Substitutions & Hacks:
- No candy melts? Use white chocolate chips dyed with oil-based coloring — or stick to classic dark chocolate + red swirls.
- Want firmer fudge? Add an extra tablespoon or two of candy melts to each bowl.
- Flavor twist? Try peppermint, almond, or marshmallow-flavored frosting for a fun switch-up — just know it may slightly affect the setting.
This section sets you up with everything you need, no specialty orders, no second grocery trip. Just practical, flexible ingredients that work.
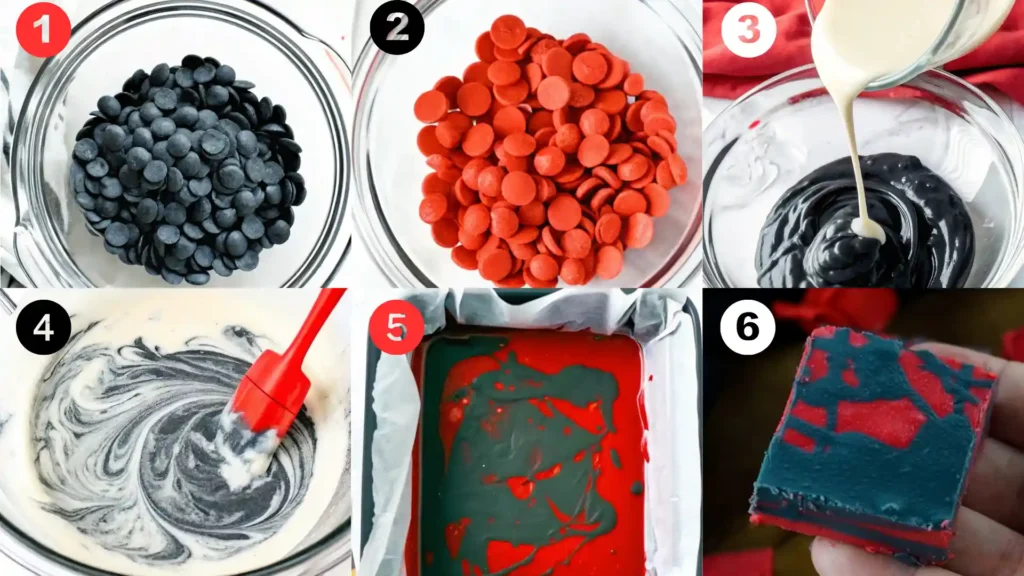
How to Make Vampire Fudge Recipe (Step-by-Step)
This is the part where it all comes together: red and black swirls, creamy texture, and that eerie Halloween vibe in every bite. Don’t blink, it is this easy.
Step 1: Prep your pan
Line an 8×8-inch square pan with two strips of parchment paper laid in a cross (like a plus sign). Lightly grease the edges if needed. This makes the fudge easier to lift and slice later.
Step 2: Melt the candy melts
In two separate bowls, microwave the red and black candy melts. Start with 30-second intervals, stirring in between. Usually, 1½ to 2 minutes total does the trick — smooth, glossy, and pourable is what you want.
Step 3: Heat the frosting
Remove the lid and foil from your frosting container. Microwave it for about 45 seconds, no need to stir. It should come out hot and fully melted.
Step 4: Mix & color
Split the hot frosting equally between the two bowls of melted candy. Stir quickly. If you want deeper tones, now’s the time to add a drop or two of oil-based black or red dye.
Step 5: Swirl it in
Spoon alternating scoops of red and black fudge mixture into your pan. No precision needed — randomness makes it cool. Use a knife or toothpick to gently swirl the colors together if you like that marbled look.
Step 6: Chill until firm
Place the pan in the fridge and let it sit for at least 4 hours. Overnight is even better if you’re not in a rush.
Step 7: Slice and serve
Once firm, lift the fudge out using the parchment sling. Cut into 25 (5×5) or 36 (6×6) squares. Clean your knife between cuts for neater lines.
Can I freeze vampire fudge?
Yes! Freeze the sliced fudge in layers (with parchment in between) inside an airtight container. It stays fresh for up to 2 months. Just thaw in the fridge before serving.
Tips for Swirling and Coloring Your Vampire Fudge Recipe
Getting those eerie, hypnotic swirls and deep vampire hues isn’t hard, but a few small tricks can take your fudge from “cute” to “wow, did you buy that?”
1. Work while everything’s still warm
The fudge mixture thickens fast once it cools. To get smooth layering and defined swirls, move quickly after combining your candy melts and frosting. If one color stiffens early, pop it back in the microwave for 10 seconds.
2. Don’t over-swirl
More isn’t always better. A few gentle strokes with a toothpick or knife go a long way. Too much swirling blends the colors into a muddy purple, spooky, sure, but not what you want.
3. Enhance color intensity
If your red or black looks too pastel, mix in a drop or two of oil-based food coloring before swirling. Powdered color also works, but never use water-based dyes in candy — they’ll cause clumping or seizing.
4. Contrast is your best friend
Alternate your spoonfuls, black, red, black, to get that eye-catching checkerboard base before you swirl. This adds depth and makes each piece look intentionally styled.
5. Chill evenly
Place your fudge flat in the fridge and give it space. Uneven chilling can create soft spots or strange textures, and nobody wants ghostly goo in the middle.
What if my fudge swirls look messy?
It’s all part of the spooky charm! Honestly, imperfect swirls often look more natural and artistic. If the top looks rough, just dust a little edible glitter or add candy eyeballs; no one will care once they take a bite.
Creative Ways to Serve Vampire Fudge for Halloween
Let’s be real, half the fun of Halloween is how you present the treats. Vampire Fudge isn’t just tasty, it’s visually dramatic, which makes it perfect for serving, gifting, or showing off.
1. Party platter centerpiece
Arrange the red-and-black squares on a dark slate board or black tray. Add a few gummy fangs, candy eyeballs, or “bloody” drizzles (red gel or jam) around them for a chilling effect.
2. Trick-or-treat safely
Wrap individual squares in wax paper or clear plastic treat bags tied with red and black ribbon. Add a tiny “vampire approved” sticker or tag for bonus points.
3. Boo baskets or teacher gifts
Tuck a few slices into Halloween gift baskets alongside themed mugs, teas, or mini candles. It’s a thoughtful homemade touch that still feels low-effort.
4. Freezer stash for last-minute guests
Keep a batch frozen and ready to go. Just pop out a few squares, thaw in the fridge, and serve cold — they’ll hold their shape beautifully and taste just as good.
5. Kids’ party activity
Let kids help swirl their fudge colors and decorate the top with sprinkles, edible glitter, or candy decorations before chilling. (Messy? Yes. Fun? Also, yes.)
Can I double the batch for a crowd?
Absolutely. Just use a 9×13-inch pan and double each ingredient. You may need to increase chill time slightly, but it slices and stores the same.
Vampire Fudge Recipe FAQs
Still have questions? Here’s what people often ask before diving into this spooky recipe.
Can I use homemade frosting instead of store-bought?
Technically, yes, but store-bought cream cheese frosting has a consistent texture that helps the fudge set properly. If using homemade, make sure it’s thick and fully cooled before mixing.
How long does vampire fudge last?
Stored in an airtight container in the fridge, it lasts up to 2 weeks. You can also freeze it for up to 2 months, just thaw in the fridge before serving.
Can I add flavor extracts?
You can, but go easy; a drop or two of peppermint, orange, or almond extract works well. Too much can affect the setting or overpower the sweetness.
What if my fudge doesn’t firm up?
Usually, this happens if the candy melts or frosting was underheated or if the mixture wasn’t chilled long enough. Pop it back in the fridge overnight, or add a little melted chocolate and re-stir, then re-chill.
Is this safe for nut allergies?
It depends on your brand of candy melts and frosting. Always check ingredient labels; many frosting brands are nut-free, but facilities may still have cross-contamination risks.
Another Recipe You’ll Love: White Chocolate Spiderweb Brownies

Vampire Fudge Recipe
Ingredients
Equipment
Method
- Line an 8×8 inch square pan with parchment paper laid in a criss-cross pattern. Lightly grease if needed.
- Melt the red and black candy melts in separate microwave-safe bowls, heating in 30-second intervals until smooth.
- Remove lid and foil from frosting and microwave for 45 seconds until fully melted.
- Divide the melted frosting evenly into the red and black bowls. Stir to combine. Add oil-based food coloring if deeper tones are desired.
- Spoon alternating dollops of red and black mixture into the prepared pan. Swirl with a toothpick or knife if desired.
- Refrigerate for at least 4 hours or until fully set.
- Lift the fudge using parchment, cut into squares, and serve or store.
Notes
Follow me on Pinterest for more delicious recipes and culinary inspiration – your best source for tasty, shareable food ideas!