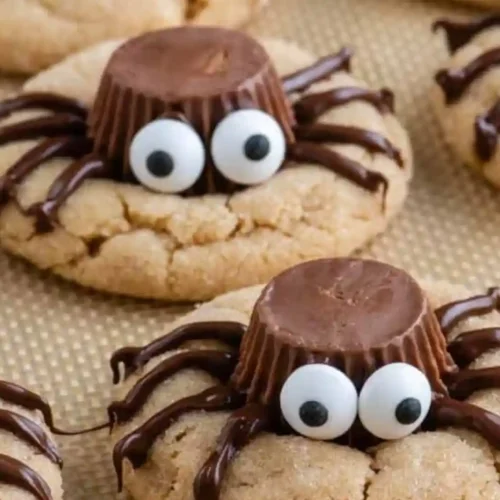
Halloween baking is more about making memories than just following a recipe. You’re not just pulling a tray of brownies out of the oven; you’re setting the mood for a night of giggles, ghost stories, and possibly a sugar-fueled kitchen dance party. And these white chocolate spiderweb brownies? They’re the edible version of a Tim Burton twist: rich, fudgy cocoa base cloaked in a silky swirl of spider-silk white chocolate.
They’re spooky but sweet, creepy yet comforting, and surprisingly simple to make. You don’t need a piping bag or a degree in cake artistry: just a toothpick, a steady-ish hand, and a little creative mischief.
In this recipe, I’ll walk you through how to whip up these white chocolate spiderweb brownies, from brownie batter basics to web-drawing wizardry. You’ll get the texture right (hello gooey center and crisp edges), master the melt (no seized chocolate here), and create a dessert that looks like it belongs on a haunted patisserie shelf.
Whether you’re baking for a class party, a horror movie marathon, or just because October demands it, these brownies bring the drama and the delicious.
Table of contents
- Ingredients for White Chocolate Spiderweb Brownies
- Step-by-Step Instructions for White Chocolate Spiderweb Brownies
- Why These White Chocolate Spiderweb Brownies Work (Expert Tips)
- Fun Variations and Festive Upgrades for White Chocolate Spiderweb Brownies
- How to Serve and Store White Chocolate Spiderweb Brownies
- FAQs
Ingredients for White Chocolate Spiderweb Brownies
Let’s build a brownie that doesn’t just sit on the plate, it haunts it (in the best possible way). Here’s what you’ll need to get started:
For the Brownie Base:
- 1/2 cup (115g) unsalted butter — Melted, but not scorching. Think “warm bath,” not “lava.”
- 1 cup (200g) granulated sugar — Fuels that crackly top.
- 2 large eggs — room temp helps them emulsify smoothly.
- 1 tsp vanilla extract — Real, if you can. It’s the background music.
- 1/3 cup (40g) unsweetened cocoa powder — Dutch-process gives a richer tone, but natural works too.
- 1/2 cup (65g) all-purpose flour — Spoon and level for accuracy.
- 1/4 tsp salt — Just enough to amplify the chocolate.
For the Spiderweb Topping:
- 1/3 cup (55g) white chocolate chips or chopped white chocolate: Use high-quality chocolate for a smoother melt.
- 1 tsp neutral oil (optional): like vegetable or coconut; makes the swirl more fluid.
- Toothpick or skewer: Your magic wand for drawing webs.
Optional Extras:
- Black food coloring gel (if you want a more “Nightmare Before Christmas” look)
- Candy eyes or sprinkles (for extra Halloween chaos)
Pro Tip: If you’re going dairy-free, sub the butter with vegan margarine and choose a plant-based white chocolate. Some brands melt better than others; test a tiny bit first.
Can I double this recipe for a crowd?
Absolutely. Just bake in a 9×13 pan and adjust the baking time (add 8–12 minutes, check with a toothpick, moist crumbs are okay, wet batter isn’t). You may need more white chocolate to cover a wider canvas.
Step-by-Step Instructions for White Chocolate Spiderweb Brownies
Let’s get to the fun part, baking the brownies and painting on that wicked little web. Don’t rush it. Let the smells creep into your kitchen and the anticipation builds. This isn’t just baking, it’s edible drama.
Step 1: Prep Your Stage
Preheat your oven to 350°F (175°C). Line an 8×8-inch square baking pan with parchment paper or lightly grease it. (Pro tip: Let the parchment hang over the edges; it doubles as a sling for easy lifting later.)
Step 2: Make the Base Spell (Brownie Batter)
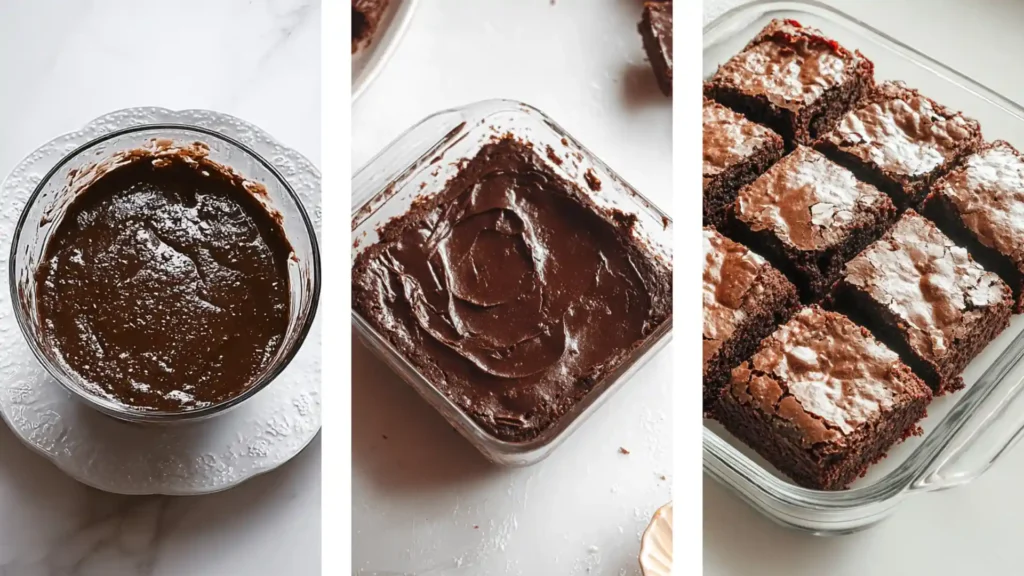
In a medium bowl, whisk together your melted butter and sugar until the mixture lightens a bit, about 30 seconds. You’re aiming for glossy, not grainy.
Crack the eggs one at a time, whisking until smooth after each addition. Add the vanilla extract and stir.
Now, sift in the cocoa powder, flour, and salt. Switch to a spatula and gently fold the dry ingredients into the wet. Don’t overmix, you’re going for thick and silky, not airy.
Step 3: Bake the Brownies
Pour the batter into your prepared pan and smooth the top. Tap the pan gently on the counter to pop any big air bubbles.
Bake for 22–26 minutes, but here’s the trick: remove them when a toothpick inserted comes out with moist crumbs, not wet batter. If it’s totally clean, you’ve gone too far, and fudgy magic is lost.
Cool in the pan for at least 15 minutes before moving on. (This gives the top that signature crackle and the center time to set.)
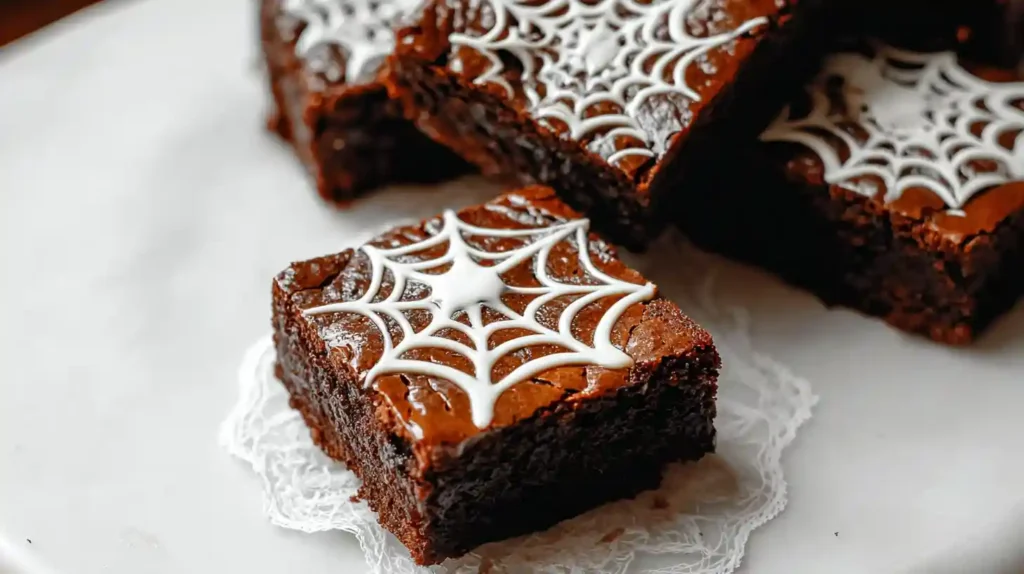
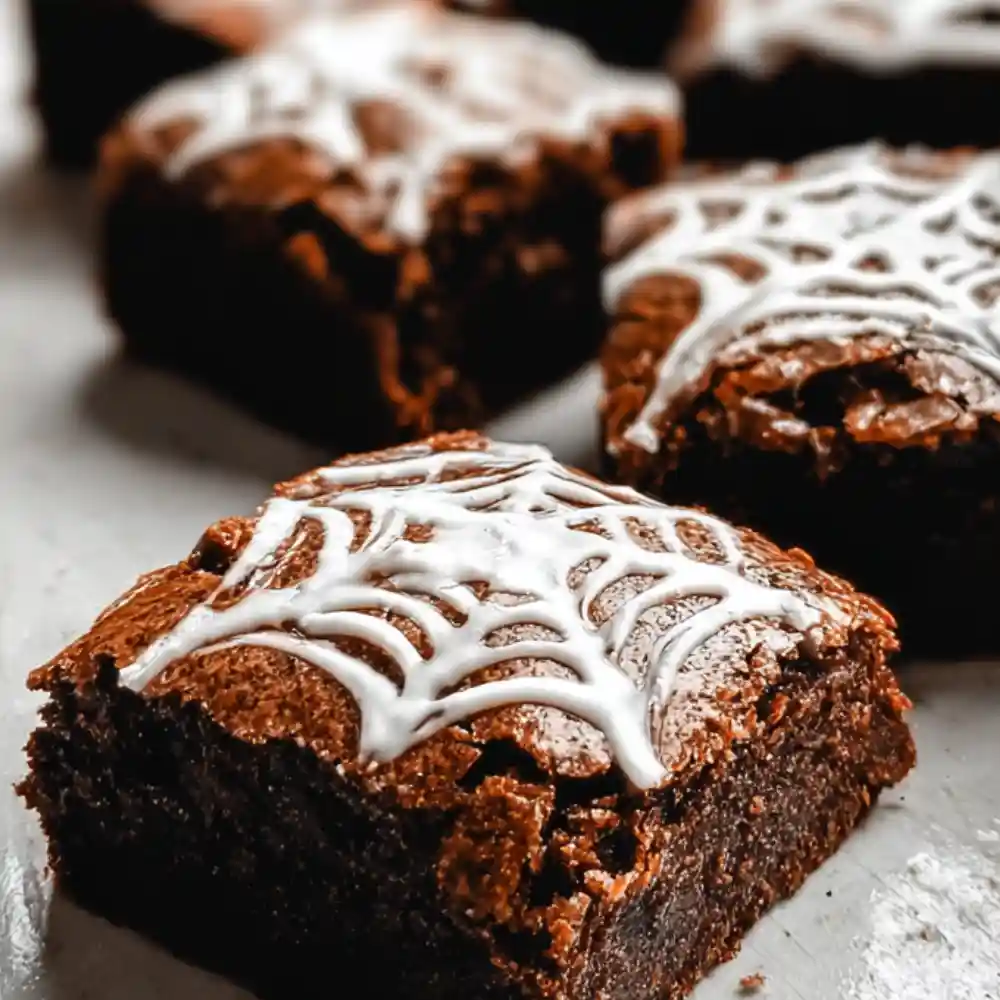
Creating the Spiderweb Topping
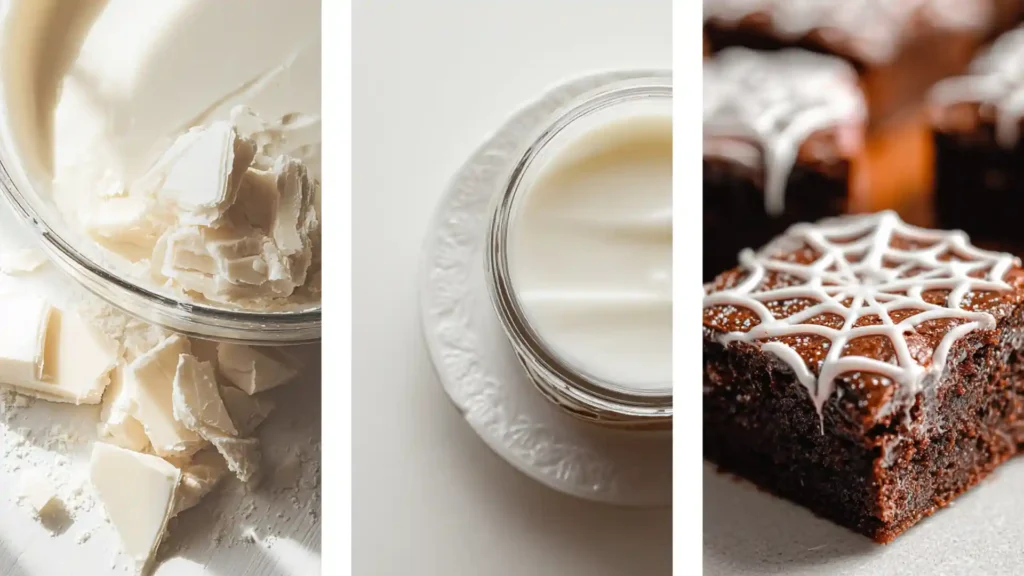
While the brownies cool slightly, melt your white chocolate in a heat-safe bowl over simmering water (or in short bursts in the microwave). Stir until smooth. If it’s stiff, add a tiny bit of neutral oil.
Here’s the fun part:
- Spoon the melted chocolate into a ziplock bag or piping bag. Snip off a tiny corner.
- Pipe 3–4 concentric circles on top of the still-warm brownies.
- Take a toothpick and, starting at the center, drag it outward like spokes on a wheel. Repeat between the lines until it looks webby.
- Add candy eyes, and sprinkles, or just admire your creepy masterpiece.
Let everything cool fully before cutting, unless you like melted web goo. No judgment.
What if my white chocolate gets clumpy?
It likely seized, meaning water got in or the heat was too high. Next time, melt gently and avoid steam contact. You can sometimes recover it by adding a splash of oil and stirring vigorously (it won’t be perfect, but it works in a pinch).
Why These White Chocolate Spiderweb Brownies Work (Expert Tips)
These brownies don’t just look festive, they land that perfect trifecta of taste, texture, and show-offy flair. But let’s pull back the curtain a bit. Here’s why each little step matters:
Tip 1: Melted Butter = Crackly Top
Whisking melted butter with sugar (instead of creaming) dissolves the crystals just enough to create that signature shiny, papery top when it bakes. It’s like brownie street cred, skip this, and the surface stays dull and cakey.
Tip 2: Underbake… Just Slightly
The middle should look set, not stiff. Pulling the brownies when they’re still slightly underbaked ensures the texture stays fudgy, not dry or boring. Trust the “moist crumbs on a toothpick” rule, not your instincts to leave them in “just a little longer.”
Tip 3: Sifting Isn’t Just Fancy Talk
Cocoa powder clumps like it holds grudges. Sifting not only prevents dry pockets but helps your batter mix faster and more evenly, so you don’t end up overmixing (which = tough brownies).
Tip 4: Drawing the Web While Warm
This one’s about timing. You want to pipe the white chocolate while the brownie top is still slightly warm, not hot enough to melt everything into soup, but just warm enough to let the web settle into the surface like a tattoo. Wait too long, and the chocolate just sits awkwardly on top.
Tip 5: Chill Before You Cut
Sure, you could dive in early. But if you want neat edges and a solid center, chill the brownies for 30–45 minutes before slicing. The web will firm up, and you’ll get those café-clean lines that make people ask, “Wait… you made these?”
Can I make the web design more dramatic?
Absolutely. Use a black chocolate base with a contrasting white swirl, or even tint your white chocolate with food gel (orange or green is classic Halloween). Want extra texture? Add a marshmallow swirl first, then the white chocolate. Layered webs = eerie perfection.
Fun Variations and Festive Upgrades for White Chocolate Spiderweb Brownies
Let’s be honest, once you master the brownie + web combo, you’re a dessert sorcerer. Here are a few ideas to remix the magic, from spooky tweaks to indulgent experiments:
Caramel-Filled Webs
Before baking, press a few soft caramel squares into the batter. They melt into gooey little surprise pockets, and the white chocolate spiderweb gets an oozy upgrade. Bonus: Drizzle a little extra caramel on top like splattered cobwebs.
Marshmallow Mayhem
Melt marshmallows with a touch of butter, then stretch the sticky strands across the brownie slab before piping the white chocolate. It’s messy. It’s chaotic. It’s perfect for Halloween.
Peppermint Swirl
Add 1/2 tsp peppermint extract to the brownie batter, and tint the white chocolate with green food gel. The result? Ghostly mint brownies that taste like a haunted candy cane.
Candy Garnish Chaos
- Candy eyes in the center of the web
- Mini chocolate spiders made with M&Ms + licorice legs
- Crushed Oreos for a graveyard crumble topping
Gluten-Free or Dairy-Free Swaps
- Use a 1:1 gluten-free flour blend for wheat-free magic
- Swap butter with vegan margarine or refined coconut oil
- Choose dairy-free white chocolate (read labels carefully; some contain milk solids)
Can I make these into brownie bites?
Yes, just spoon batter into mini muffin tins (about 2/3 full), bake for 10–12 minutes and add mini webs on each one. Perfect for party trays or trick-or-treat platters. Pro tip: Freeze for 10 minutes before piping if the surface is too dry.
How to Serve and Store White Chocolate Spiderweb Brownies
These white chocolate spiderweb brownies aren’t just meant to sit quietly on a plate; they’re the kind of dessert that walks into the room and says, Hey. I’m the main event.
Serving Ideas
- Party-Ready Platter: Cut into clean squares and scatter candy eyes around the tray. Want an extra effect? Serve on a dark slate board with dry ice fog (yes, really).
- Kids’ Tables: Slice into smaller bites and stick tiny Halloween flags in each. Less mess, more cuteness.
- Date-Night In: Warm a piece slightly and pair it with vanilla ice cream and espresso. Who says spooky can’t be romantic?
BTW, if you want to go all in, serve alongside a Halloween cocktail (think black vodka + cranberry) or a cinnamon-spiced hot cocoa.
Storage Tips
These brownies hold up like champs, especially if you don’t slice them all at once.
- Room Temp: Store whole or cut brownies in an airtight container for up to 3 days. Keep them cool and out of direct sunlight (white chocolate melts fast).
- Fridge: Extends freshness to 5–6 days. Let them come to room temperature before serving for the best flavor.
- Freezer: Yes, even with the web! Freeze uncut brownie slabs (wrapped in foil + plastic) for up to 2 months. Thaw overnight in the fridge, then bring to room temperature. You may want to add a fresh drizzle of white chocolate for a cleaner look.
How do I stop the white chocolate from smudging during storage?
Let it sit fully at room temperature before covering it. If stacking, place parchment between layers. For travel, chill them first; firm chocolate travels better than soft swirls.
FAQs
How do I prevent white chocolate from seizing?
Ah, yes, the dreaded grainy blob. White chocolate is fussy. Make sure your bowl and tools are completely dry, and melt gently using a double boiler or short 15-second bursts in the microwave. If it seizes, try adding a teaspoon of neutral oil and stirring like your dessert life depends on it. Sometimes, it recovers. Sometimes… not so much.
Can I use dark or milk chocolate for the web instead?
Definitely. It flips the look (think black widow instead of snow spider), but it works just as well. For contrast, use a white base swirl with dark lines or vice versa. Just note that milk chocolate melts a bit differently; it’s slightly softer and may need less oil.
What pan size works if I double the recipe?
Go for a 9×13-inch pan. Baking time increases by 8–12 minutes, but start checking at the 30-minute mark with a toothpick in the center. Also? You’ll need about double the web topping, too; it’s a bigger canvas.
Can I pipe the web after the brownies are fully cool?
Technically, yes. But it’s harder to get the chocolate to “settle” into the surface when it’s cold. If you missed the warm window, warm the brownie top slightly (10–15 seconds in the microwave) before decorating.
Can I decorate these ahead of time?
Yep. Once the web sets, it holds beautifully for days. Just store them carefully (single layers or with parchment between), and avoid humid environments, as it can dull the shine of the chocolate.
Tasty Recipe Halloween to Try Next: Pumpkin Brownie recipe

White Chocolate Spiderweb Brownies
Ingredients
Equipment
Method
- Preheat the oven to 350°F (175°C). Line an 8×8-inch pan with parchment paper or lightly grease it.
- In a medium bowl, whisk melted butter and sugar until slightly lightened. Add eggs one at a time, whisking after each. Stir in vanilla.
- Sift in cocoa powder, flour, and salt. Fold gently with a spatula until just combined.
- Pour the batter into the pan, smooth the top, and bake for 22–26 minutes until a toothpick comes out with moist crumbs. Let cool 15 minutes.
- While cooling, melt the white chocolate with optional oil. Spoon into a piping bag and snip a small tip.
- Pipe concentric circles on the warm brownie surface. Drag a toothpick from center outward to create a spiderweb effect.
- Cool completely before slicing and serving.
Notes
Follow me on Pinterest for more delicious recipes and culinary inspiration – your best source for tasty, shareable food ideas!