Baking fresh bread at home is very satisfying. The smell filling your kitchen, the warm crust, and the soft, fluffy inside create an experience that is hard to match. If you feel unsure about baking from scratch, don’t worry! With the right tools and guidance, anyone can become a skilled home baker. Dave’s Killer Bread Maker Recipes is a collection made for beginners who want to explore bread making easily.
Dave’s Killer Bread has a good reputation for using quality ingredients and tasty flavors. Their recipes are easy to follow but also encourage creativity in the kitchen. Whether you are new to baking or want to improve your skills, these recipes provide a great starting point. They include classic whole grain loaves and unique flavor combinations. Each recipe ensures success while letting you try different ingredients and techniques.
This blog post will cover some of Dave’s most popular bread maker recipes that are ideal for beginners. We will provide step-by-step instructions, tips for common issues, and suggestions for customizing each loaf to your taste. So put on your apron and get ready for a delightful baking journey that will fill your home with warmth and deliciousness!
Table of contents
- Essential Tools and Ingredients for Bread Making
- Simple and Delicious Bread Maker Recipes for Beginners
- Tips and Tricks for Perfect Bread Every Time
- Exploring Different Types of Bread with Dave’s Killer Bread Maker Recipe
- Troubleshooting Common Bread Maker Issues
- Taking Your Bread-Making Skills to the Next Level
- FAQs
Essential Tools and Ingredients for Bread Making
Measuring Up
Measuring cups and spoons are vital for accuracy, as even a slight deviation in ingredients can affect the final product. I learned this lesson the hard way when I accidentally added too much salt to my first loaf, resulting in a rather inedible creation. Now, I always double-check my measurements before starting.
The Building Blocks of Bread
In terms of ingredients, having fresh and high-quality items is key to achieving great results. Flour, yeast, water, and salt are the basic building blocks of any bread recipe. I’ve found that experimenting with different types of flour can yield exciting results; for instance, using whole wheat flour adds a nutty flavor and a hearty texture to the bread.
Getting Creative with Ingredients
Additionally, incorporating ingredients like seeds, nuts, or dried fruits can elevate your loaves to new heights. One of my favorite creations was a cranberry walnut bread that I made for Thanksgiving; it was a hit with family and friends alike.
Simple and Delicious Bread Maker Recipes for Beginners
For those just starting, simplicity is key. One of my go-to recipes is a basic white bread that requires minimal ingredients and effort. All you need is flour, water, yeast, sugar, and salt.
I remember the first time I made it; I was amazed at how quickly everything came together. After adding the ingredients to the bread maker and selecting the basic setting, I could sit back and relax while it worked its magic. The result was a soft, fluffy loaf that was perfect for sandwiches or simply slathered with butter.
Another fantastic recipe for beginners is banana bread. This one holds a special place in my heart because it reminds me of my grandmother’s kitchen. She would always have overripe bananas on hand, and we would whip up a batch together.
Using the bread maker for this recipe is incredibly easy; just mash the bananas and mix them with flour, sugar, eggs, and baking soda. The sweet aroma that fills your home as it bakes is simply irresistible. Each slice is moist and flavorful, making it an ideal treat for breakfast or an afternoon snack.
Tips and Tricks for Perfect Bread Every Time
| Tip | Trick |
|---|---|
| Use high-quality flour | Choose flour with high protein content for better gluten development |
| Proper kneading | Knead the dough until it becomes smooth and elastic |
| Correct proofing | Allow the dough to rise in a warm, draft-free environment until doubled in size |
| Preheat the oven | Ensure the oven is fully preheated before baking the bread |
| Use a baking stone | Place a baking stone in the oven to create a crisp crust |
As I continued my bread-making journey, I discovered several tips and tricks that helped me achieve perfect loaves consistently. One crucial piece of advice is to pay attention to the order in which you add your ingredients. For most recipes, it’s best to add liquids first, followed by dry ingredients, with yeast being added last to ensure it activates properly.
This small detail made a significant difference in my baking results; my loaves became more consistent in texture and rise. Another tip that has served me well is to keep an eye on the dough during the mixing process. Sometimes, depending on humidity or flour type, you may need to adjust the liquid or flour slightly to achieve the right consistency.
I remember one time when my dough looked too dry; I added a tablespoon of water and watched as it transformed into a smooth ball. This attention to detail has helped me avoid many potential mishaps and has made my baking experience much more enjoyable.
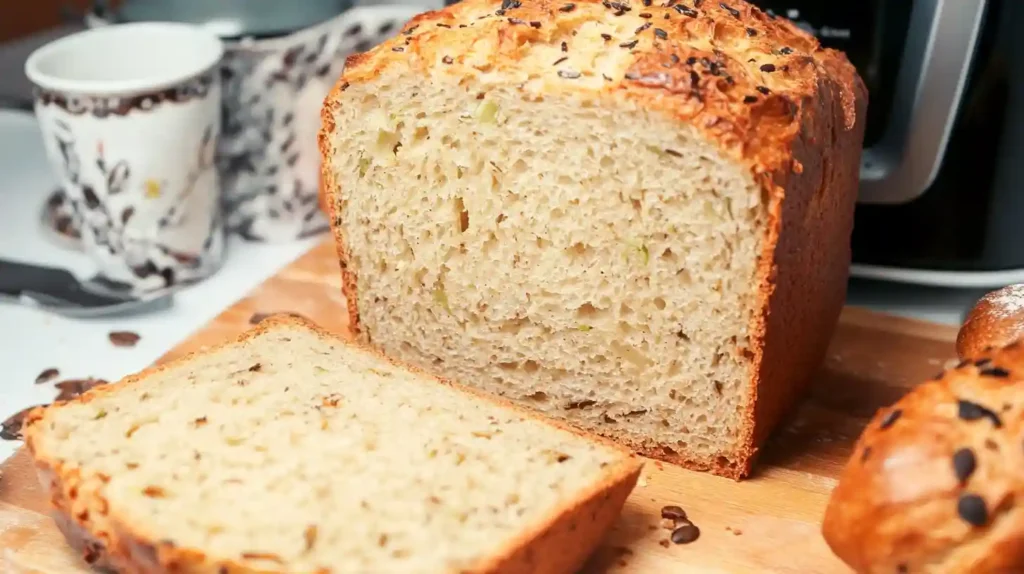
Exploring Different Types of Bread with Dave’s Killer Bread Maker Recipe
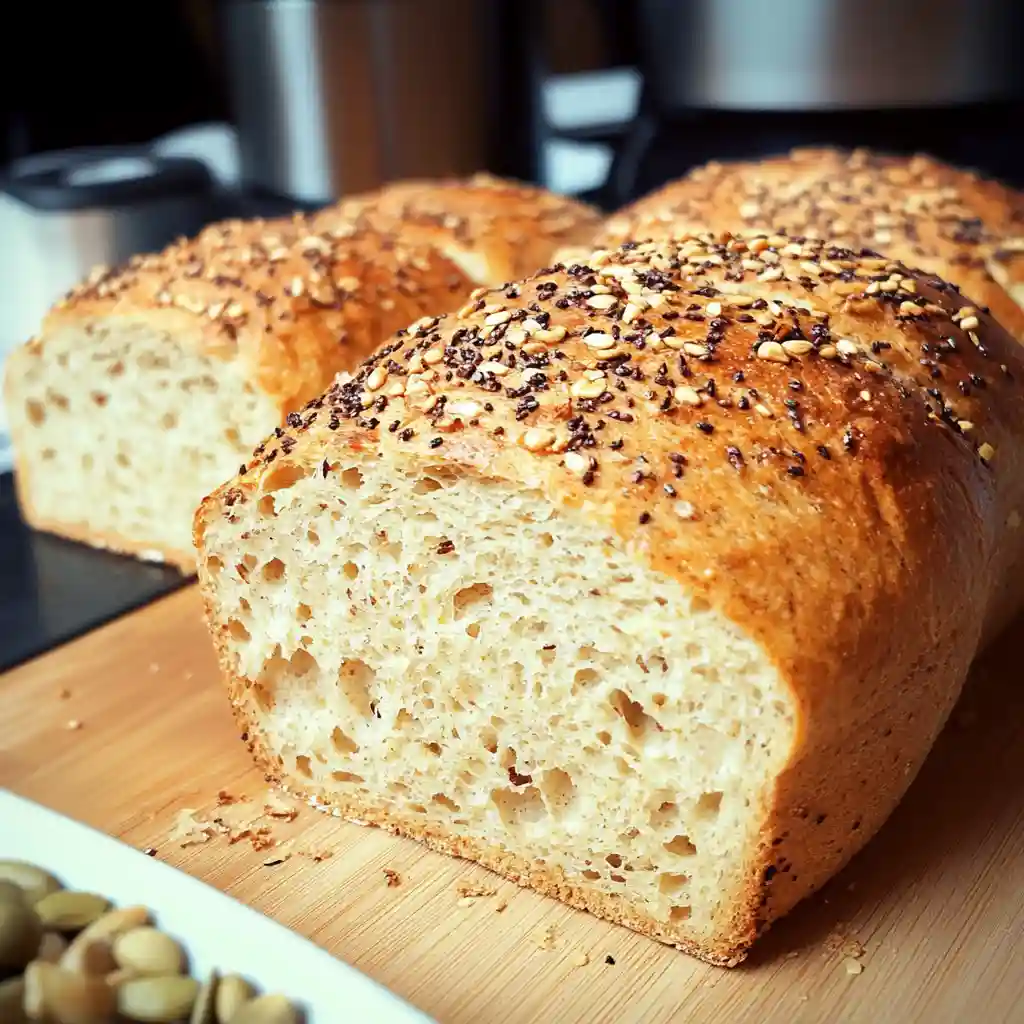
Once I felt comfortable with basic recipes, I began exploring different types of bread using Dave’s Killer Bread Maker recipe. This brand is known for its commitment to quality ingredients and unique flavors, which inspired me to experiment beyond traditional loaves. One of my favorite discoveries was making a multigrain bread packed with seeds and grains.
The texture was hearty, and each slice was bursting with flavor—perfect for toast or sandwiches. I also ventured into making specialty breads like focaccia and sourdough using my bread maker. The focaccia was surprisingly easy; I simply followed a basic dough recipe and added olive oil and herbs before baking.
The result was a fragrant, golden loaf that paired beautifully with pasta dishes. Sourdough was more challenging but equally rewarding; after some trial and error with fermentation times, I finally achieved that tangy flavor and chewy crust that makes sourdough so beloved.
Troubleshooting Common Bread Maker Issues
Despite my growing confidence in bread making, I encountered my fair share of challenges along the way. One common issue is bread that doesn’t rise properly. This can be frustrating, especially after waiting patiently for hours only to find a dense loaf at the end.
Through research and experience, I learned that expired yeast is often the culprit. Now, I always check the expiration date before starting a new batch; fresh yeast makes all the difference in achieving that perfect rise. Another issue I faced was uneven baking or burnt crusts.
Initially, I thought it was just a matter of adjusting the settings on my machine, but I soon realized that placement matters too. Keeping my bread maker on a flat surface away from heat sources helped ensure even baking. Additionally, using the right crust setting for each recipe has been crucial in achieving that golden-brown finish without burning.
Taking Your Bread-Making Skills to the Next Level
As my skills improved, I found myself eager to take my bread-making abilities to new heights. One way I did this was by experimenting with different flavor combinations and techniques. For instance, I started incorporating herbs and spices into my dough—rosemary focaccia became a household favorite!
Additionally, learning about autolyse techniques helped improve my dough’s structure and flavor development. I also began sharing my creations with friends and family, which not only boosted my confidence but also provided valuable feedback. Hosting small gatherings where everyone could sample different types of bread became a delightful tradition in my circle.
It was heartwarming to see others enjoy something I had poured my heart into creating. With each loaf baked and shared, my passion for bread making grew stronger, turning what started as a simple hobby into an exciting culinary journey filled with endless possibilities.
FAQs
What is a bread maker, and how does it work?
A bread maker is a kitchen appliance that automates the process of making bread. It typically includes a bread pan, kneading paddle, and a control panel with settings for different types of bread. The bread maker mixes, kneads, proofs, and bakes the bread, making the process much simpler for beginners.
What are the essential tools and ingredients for bread making with a bread maker?
Essential tools for bread making with a bread maker include measuring cups and spoons, a kitchen scale, a bread knife, and oven mittens. Essential ingredients for bread making include flour, yeast, salt, sugar, water, and any additional ingredients for flavor, such as nuts, seeds, or dried fruits.
What are some simple and delicious bread maker recipes for beginners?
Some simple and delicious bread maker recipes for beginners include basic white bread, whole wheat bread, cinnamon raisin bread, and honey oat bread. These recipes typically require minimal ingredients and are easy to follow for those new to bread making.
What are some tips and tricks for perfect bread every time with a bread maker?
Some tips and tricks for perfect bread every time with a bread maker include accurately measuring ingredients, using the correct type of flour for the recipe, adding ingredients in the order specified, and following the recommended settings for the bread maker. Additionally, ensuring the yeast is fresh and using the appropriate amount for the recipe is crucial for successful bread making.
What are some common bread maker issues, and how can they be troubleshooted?
Common bread maker issues include dense or sunken loaves, overproofed or underproofed bread, and crusty or burnt bread. These issues can be troubleshooted by adjusting the amount of ingredients, ensuring the yeast is fresh, and experimenting with different settings on the bread maker to find the optimal combination for the specific recipe.
How can one take their bread-making skills to the next level with a bread maker?
To take bread-making skills to the next level with a bread maker, one can experiment with different types of flour, such as rye or spelt, and incorporate various mix-ins, such as herbs, cheeses, or olives. Additionally, learning about different proofing techniques and experimenting with shaping and scoring the dough can elevate bread-making skills.
- A Delicious Bread to Try Next: Vegan Jalapeno Cheese Artisan Bread Recipe

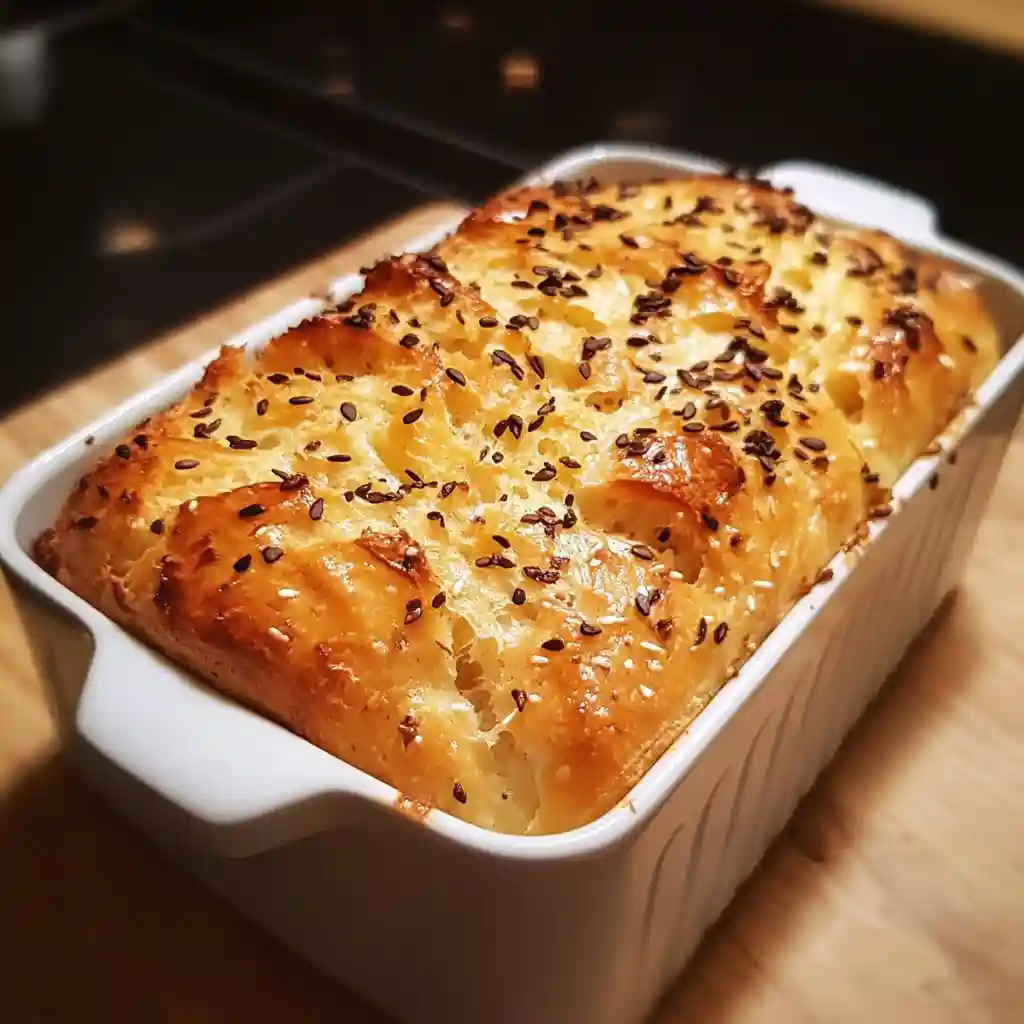
Dave’s Killer Bread Maker Recipe
Ingredients
Method
- Ensure your bread machine pan is clean and properly inserted.
- Select the appropriate whole wheat or basic bread cycle.
- Pour the warm water into the bread pan.
- Add the olive oil and honey.
- Sprinkle in the flour, ensuring it covers the liquid.
- Add salt and flaxseeds on one side, and make a small well in the center for the yeast (keeping it separate from the liquid).
- Choose the whole wheat or basic bread setting.
- Select desired crust level (light, medium, or dark).
- Press Start and let the machine knead, rise, and bake the bread.
- After the first few minutes of mixing, check the dough. It should form a smooth ball.
- If too dry, add 1 tbsp warm water. If too wet, add 1 tbsp flour.
- Once baking is complete, carefully remove the bread pan using oven mitts.
- Let the bread
Notes
- Calories: 180 kcal
- Fat: 3g
- Carbohydrates: 32g
- Protein: 7g
- Fiber: 5g
- Sugar: 3g
- Sodium: 240mg